Nailing Focus: A Simple Guide to Autofocus Microadjustment
 by
Adam Welch
by
Adam Welch

The importance of dead-on focusing is obvious. Securing clean and crisp focus on a subject or scene is one of the most fundamental foundations of achieving a strong photograph.
If you’re a photographer who unfortunately lacks an unlimited budget (like the guy typing this) then you understand how important it is to squeeze every last drop of precious performance out of whatever gear you have on hand. But how do you know when you’ve reached the upper limits of what your camera or lens is capable of achieving?
In most situations, your gear is far more capable than you or I can ever hope to be. So in reality, it is most often the shooter who limits the gear… not the other way around. You’re about to learn of a lesser known technique for ensuring your images are in the best focus possible.
Applying the knowledge found within this article should bring you one step closer to residing in a blissful and regret-free world of photographic euphoria.
The technique is known as Autofocus Microadjustment. It’s a nice and interesting designation for what amounts to fine tuning how your AF lenses communicate with your camera in order to produce the most accurate focus possible.
So how is this done? Good question… I’m glad you’re still with us. Like most things, it’s a lot less involved and certainly a lot less intimidating that it sounds. Admittedly, the method for the adjustments can be made considerably more complicated. Luckily for us both, we will safely reside at the shallow end of the complication pool and keep things simple. In, fact this adjustment only requires a few minutes of your time but can yield surprising results.
I normally shoot Canon. No, I don’t take part in any of those “camera” measuring contests over which manufacturer makes the best whatever. It’s just my choice. That being said, this tutorial is based on Canon equipment. If you shoot with a camera from another manufacturer the overall process and concept should still be the same. As always, your camera’s manual is one of your allies.
Most higher tier models support this feature. Here are the Canon models that have the option for AF microadjustment as of writing this article: 1D series, 5D series, 6D, 7D series, 70D, and 50D.
None of the Rebel series currently have this option at the time this article was written.
I’ll say again, there is not one certain right or wrong way to do this. This walk-through requires nothing but your camera, lens, tripod (or some VERY stable platform), and some type of stationary three dimensional high-contrast object. In other words, photograph something that lets you easily discern and direct where you are focusing. Don’t shoot at flat walls since these will give you no frame of reference.
AF Microadjustment Guide
- Secure the camera on a tripod if possible.
- If your lens has image stabilization be sure to switch it to “off“.
- Engage the LCD screen and switch the camera’s AF selection to Live View. This will give you an accurate view of what the camera is seeing.
- Position your camera so that your subject is in the middle of the viewfinder and switch the focus point selector to single point. Be sure the focus point is centered as well. You should be at a distance of no less than 50 times the focal length of the lens. If you’re shooting a 50mm then this is about eight feet or approximately 2.5 meters.
- Set your lens wide open (smallest F-stop number) and use your LCD while still in Live View to focus as sharply as you can.
- Without moving anything (tripod, focusing ring) switch your camera from Live View to One-Shot AF.
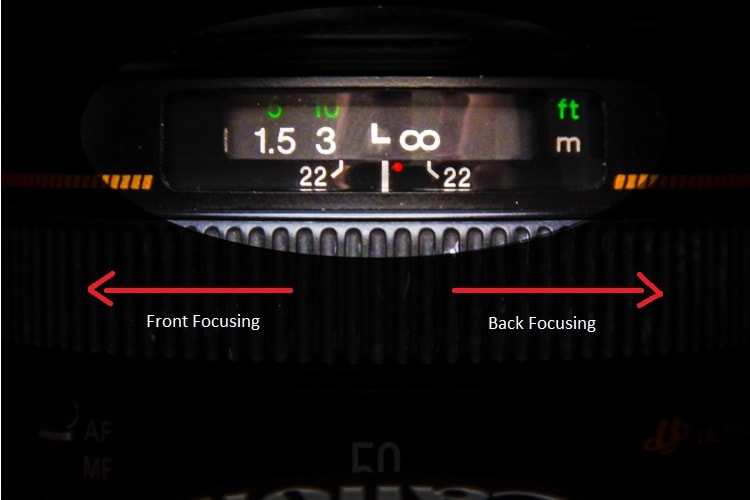
- Carefully press the shutter button half-way or use the back button AF while looking at the focus ring of the lens. If your AF is accurate, the focusing ring should not move. If it does move remember which way and by how much… that means you best write it down. If it moves closer then it means you are focusing in front of your intended location. If it moves further away then your a back-focused which means the focus is behind where you intended.
Canon recommends taking three consecutive images at -10, 0, and +10 adjustment steps and then review them at 100% magnification on your computer monitor. Make more or less images but the important thing is to pay close attention to the changes in each. If you find that the lens does need adjusting, follow these steps.
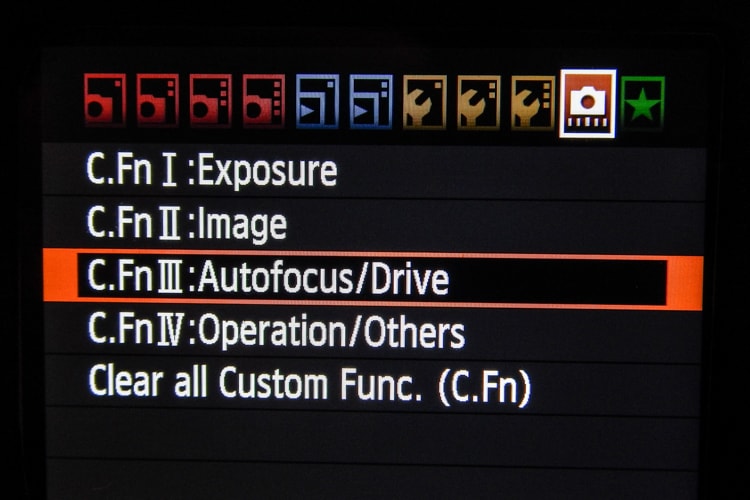
- Press the menu button.
- Locate in the camera settings the heading “Autofocus/Drive” and then select that option.
- If you find that you have focusing problems no matter what lens you use, select “Adjust all by same amount“. If you only seem to have trouble with select lenses choose “Adjust by lens“.
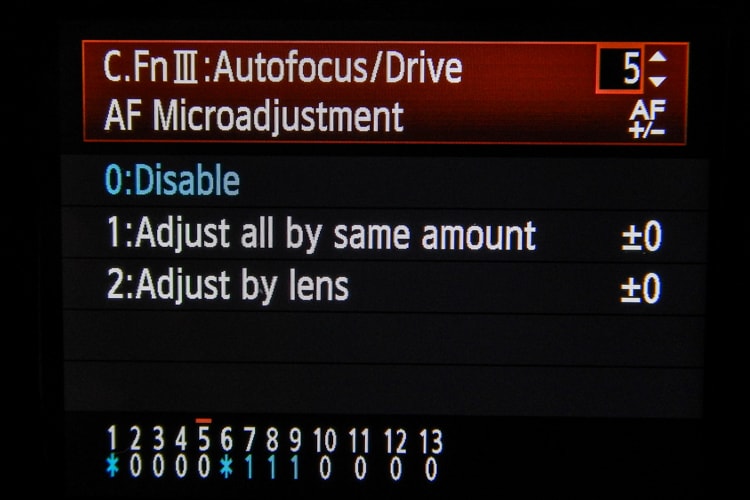
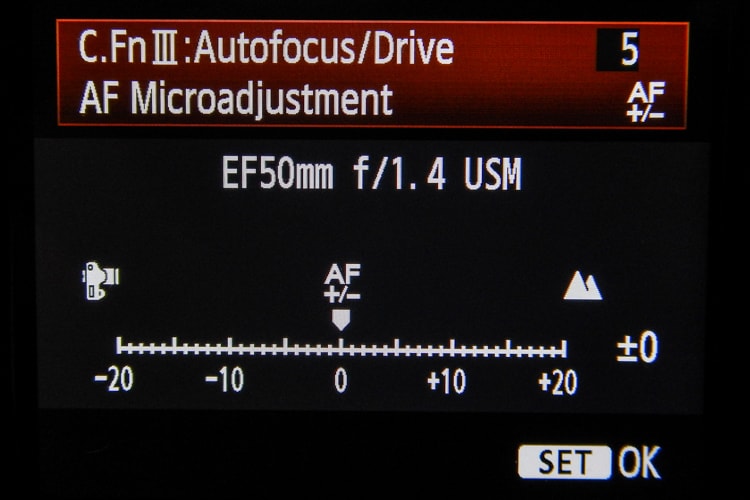
- Press the “Info” button to bring up the adjustment screen and make the required changes to bring your test images into focus. Press “OK” when you’re ready to save your changes.
That’s it!
Those few easy steps can help you become a more meticulous shooter and also help you get the most out of your gear. Granted, this is geared towards those folks who are admittedly a little obsessive about controlling all aspects of their craft. This is not a good or bad attitude to have towards any occupation. However, in my experience, the fewer variables you have to worry about the better the outcome.
Some things to consider concerning AF Microadjustment
The lens I used was a 50mm prime lens. Prime means that it is a non-zoom lens. If you use a zoom or telephoto lens then the procedure becomes a little more involved. Seeing how the AF is dependent on the focal length of your lens, a zoom lens introduces a huge number of variables in focusing. It’s recommended by Canon to make adjustments at the shortest and longest focal length of your lens. Or, conversely, make the adjustments and register the changes at your most used focal lengths.
It should also be noted that this AF Microadjustment is not a “cure all” remedy for your focusing problems. It doesn’t not solve optical abnormalities or fix physical defects in your camera or lens. If you run into a problem that you can’t seem to solve or don’t feel comfortable solving it’s always better to leave it to the professionals and send your camera or lens to the manufacture for qualified service.
About the Author: Adam Welch
Adam is an author, adventurer, photographer and a jolly co-founder of Contrastly. You can usually find him on some distant trail making photographs, in his darkroom or at his computer writing and planning his next project. Follow his work over at his
website , Facebook, Instagram and YouTube .