Photographing Motion Blur: Various Examples and Practical Tips & Tricks

Motion blur is a fascinating photographic technique that’s one of the best ways to convey a sense of movement in an otherwise static image.
This is an interesting technique – especially considering that in most cases, photography is used to “freeze time,” with a still image.
Still, in some cases, conveying a sense of motion and movement is arguably a better option than simply freezing action, and is a much better way to add a dynamic sense of life and action to a photograph.
If you’re interested in using motion blur in your photography, here are some tips to get you started.
Types of Motion Blur
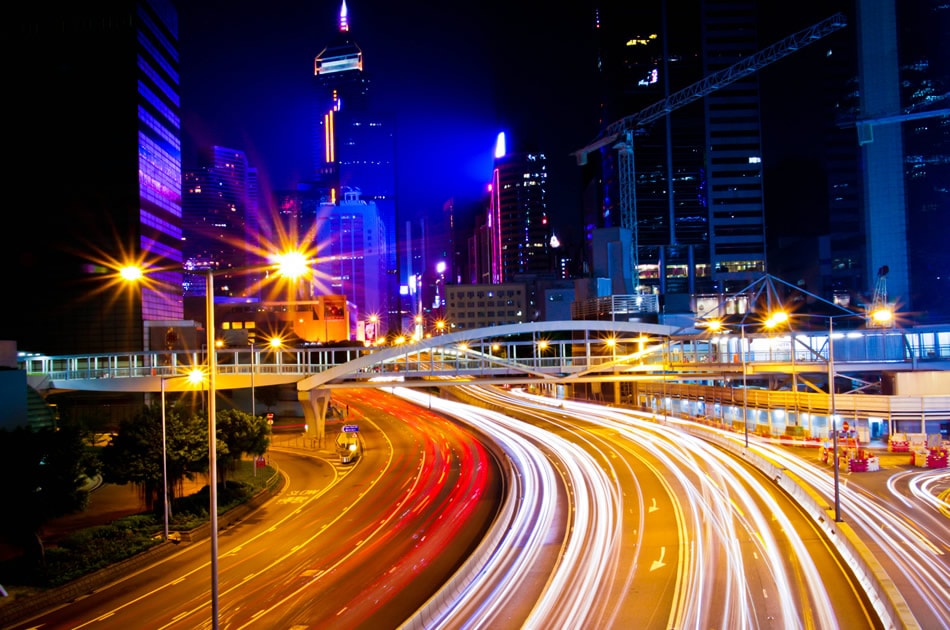
Image by dingcarrie. Due to a long exposure, the lights of traffic are blurred and the rest of the image is in focus.
There are two basic kinds of motion blur, a blurred subject with the background in focus, and a blurred background with the subject in focus – also known as panning.
-
Blurred Subject – Background in Focus
Intentionally blurring the subject is a great way to incorporate movement, and show just how fast the subject is moving. Often this technique is used to capture night traffic, where the cars’ headlights and taillights become blurred lines of movement. Another example of this technique is waterfall photography.
Using a slow shutter speed to capture the water as it moves creates a blurred effect of the falls, while the rest of the image remains clear and in focus.
-
Blurred Background – Subject in Focus (Panning)
Panning is another popular way to capture motion blur, and is ideal for those times when you want the moving subject to remain in focus, and the background to be blurred. Panning involves using a relatively slow shutter speed, something like 1/30 and focusing on the subject while holding the lens halfway down. You then track the subject through the viewfinder while they move. With the subject in focus, release the shutter. The result is a clear and in-focus subject and a blurred background that conveys a wonderful feeling of movement.
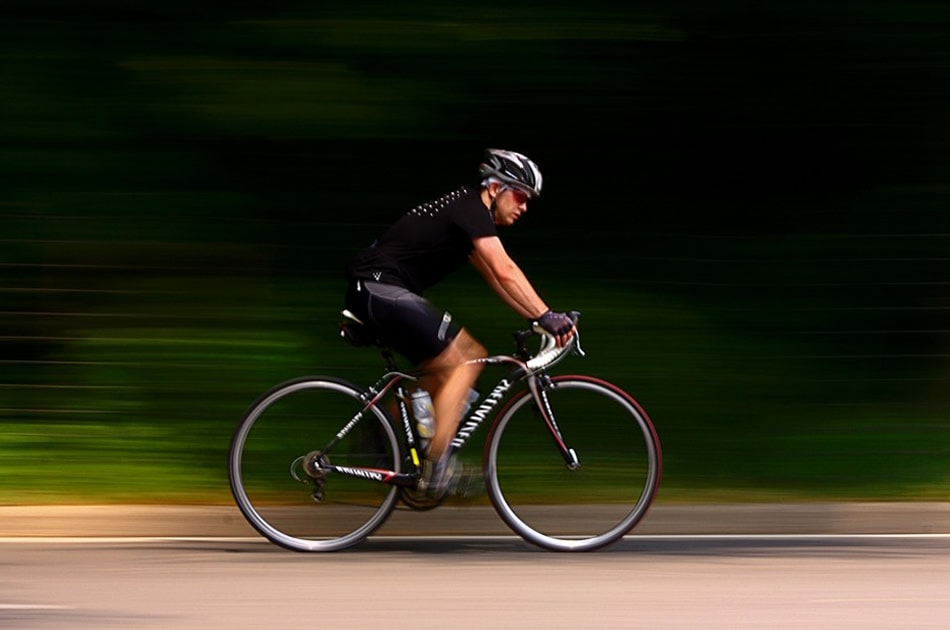
Image by Yogendra Joshi. An example of panning: the subject is clear and the background is blurred.
Capturing Motion Blur
It can take a lot of practice to perfect the art of motion blur – especially panning, but motion blur is a great trick to add to your photography skill set. Panning and capturing motion blur can also be a lot of fun.
Here are some tips to help you to capture the blur.
-
Slow Down Your Shutter Speed
Your shutter speed is the most important setting when it comes to motion blur. The speed at which the shutter opens and closes – is what will either freeze the action, or render it as a blur.
Your shutter speed should be slow in order to blur the movement, but the precise speed that you’ll want to use will depend upon a few factors including how close you are to the subject, and their speed. If you’re photographing a race car for example, you’ll want to use a relatively fast speed to capture the blur.
However if you are photographing a subject that’s moving slowly, you are going to need a much slower shutter speed to capture movement as blur. There really isn’t a one-setting-fits-all solution when it comes to motion blur – it requires a lot of experimentation to get it just right.
-
Stabilize the Camera
Be sure to stabilize the camera. Using slow shutter speeds, and longer exposures can cause the entire image to become blurred. Using a tripod is usually the best option, but finding a stable surface can work too.
You might also consider using a remote release to prevent the camera from shaking when you release the shutter. Using a tripod or monopod when panning is optional, and largely a matter of personal preference. Some photographers feel that a tripod hinders the stabilization process, and you’ll want to find a way to steady the camera that works for you.
-
Compensate for the Slow Shutter Speed if There’s Too Much Light
Since your shutter speed is going to be left open longer than normal to capture some blur – you may need to compensate for the extra light. A smaller aperture (bigger number) is generally used to help reduce the amount of light hitting the sensor, allowing you to use a slow shutter speed without hurting the exposure. If you use shutter priority mode, your camera will adjust the aperture for you.
If you’re using manual though, you’ll want to open up the aperture as you increase the shutter speed and close down the aperture as you decrease the shutter speed. You’ll also want to keep a low ISO since a lower number will make the camera less sensitive to light. Using a neutral density (ND) filter is another way to reduce the amount of light that reaches the sensor. These filters act like sunglasses for your camera, reducing the amount of light that comes through the lens and allowing you to use a slow shutter speed during brighter lighting conditions.
Examples of Motion Blur
Let’s look at a few practical examples of motion blur.
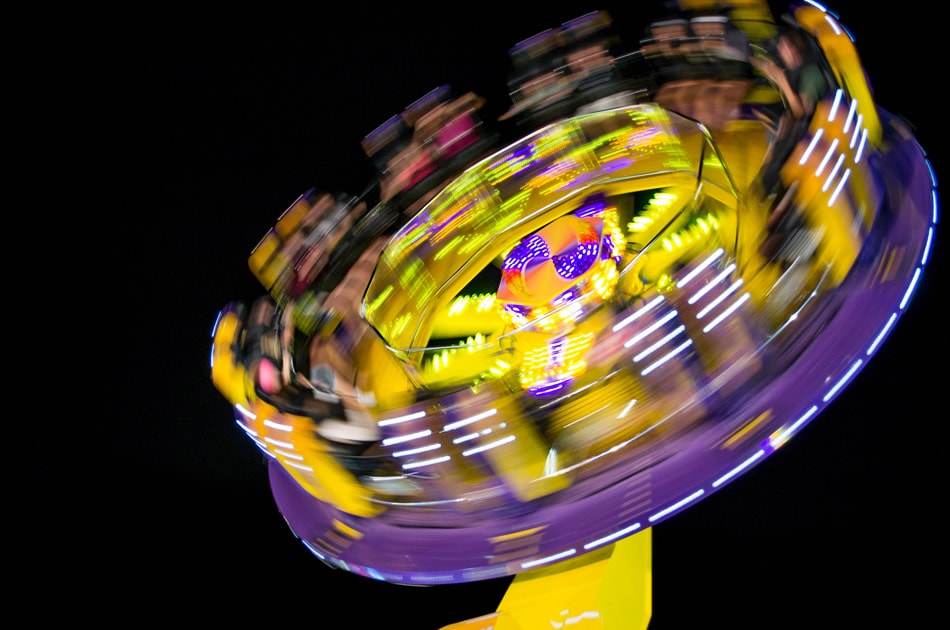
Image by Brian Holland. Aperture: ƒ/5 · Shutter Speed: 1/8 · ISO: 200
Due to the speed of the carnival ride, the photographer was able to use a shutter speed of 1/8 of a second to capture the blur of motion. If the ride had been slower, it would have required a slower shutter speed to create the blur effect.

Image by Dave W. Aperture: ƒ/5.6 · Shutter Speed: 5 · ISO: 200
In this image, the photographer used a slow shutter speed of five seconds to create motion blur. At this speed, the water becomes blurred due to its movement, and the rest of the image is in focus. Distance from the subject, as well as the speed of the flow and the volume of water all affect the required shutter speed. If the photographer had been closer to the water, they would have needed to use a faster shutter speed to capture the blurred effect. A slower flow and a higher volume of water would require slower shutter speeds.
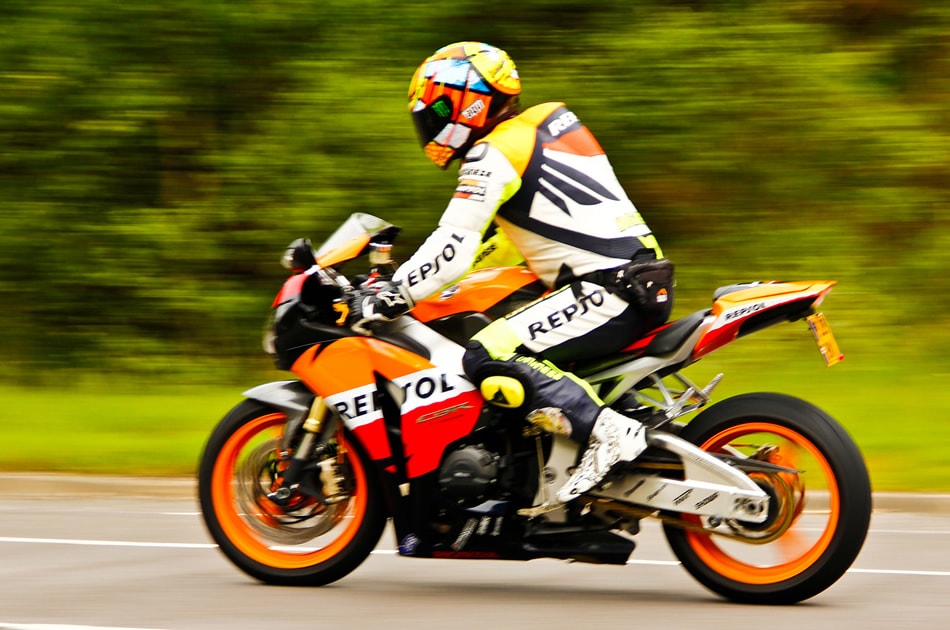
Image by Natesh Ramasamy. Aperture: f/5.6 · Shutter Speed: 1/125 · ISO: 100
This photographer used panning and a speed of 1/125 of a second to capture blur. Most fast-moving subjects like cars and motorcycles will require fast shutter speeds of around 1/60 and 1/125.
Capturing motion blue requires time, patience, and practice – but the results are more than worth it. With motion blur, you’ll be able to create dynamic images and add movement and speed when the composition calls for it. The next time you automatically think “freeze action,” when sizing up a moving subject, why not try a few shots where the action is blurred as well? You might be surprised at the results.
Do you enjoy capturing motion blur?
About the Author: Christina Harman
 Christina is a part time blogger and full time photography enthusiast living in Southeast Alaska. She enjoys travel photography and has taken pictures in countries such as Mexico, England, France, and China. She likes sunny days, new lenses and drinking good coffee. You can visit her at Tangled Thoughts.