Traffic and Light Trails – How to Shoot Like a Pro

If you’ve ever thought that light trails from traffic were just about the coolest thing you’ve ever seen, you could be forgiven for that… because they are stellar to look at in pictures!
Gaze at any light trails, and you can easily think that you’re looking at some fancy graphics or a nifty design, but no. They just come from regular cars.
The really neat thing about shooting light trails is that it bleeds over into nighttime photography because that’s when all the action can be captured very noticeably. Though nighttime clearly doesn’t seem like the best time to take pictures, one of the few exceptions to this rule is when you’re shooting traffic light trails.
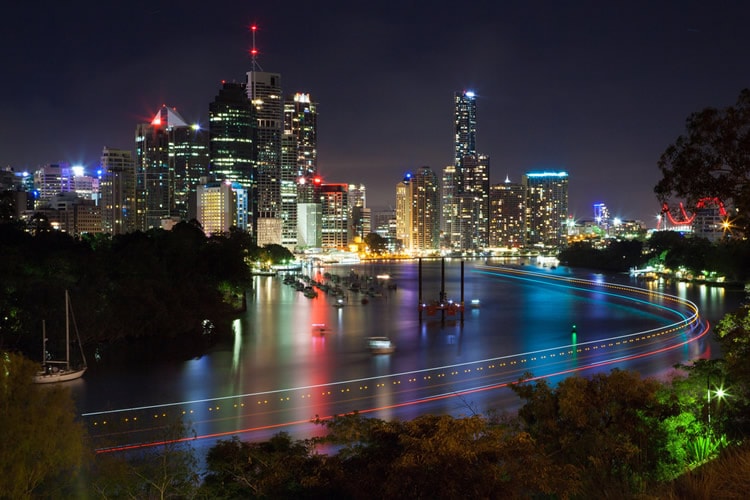
photo by Andrew Sutherland
If you haven’t even thought about this technique before, by all means, give it a try! It’s highly unique, extremely interesting and deeply engrossing. Here’s what you should do.
What to Keep in Mind From the Beginning
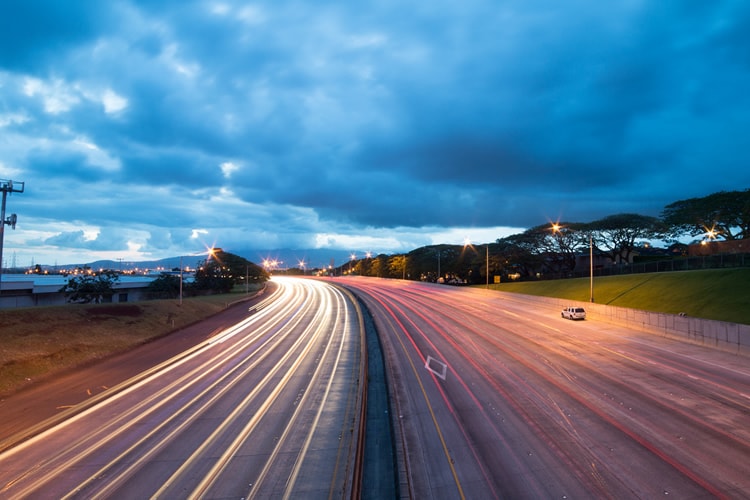
photo by be808
To succeed at shooting traffic light trails, you’ll have to take the most important rule to heart: Always keep the shutter of your camera open just long enough in order to get the car lights when they’re passing through the frame.
Typically, this can last anywhere from just 10 seconds to a couple of minutes. Variables that will impact the ideal length include the amount of traffic you’re shooting and the particulars of the situation.
Another key point to always keep in your head is ambient light. A fair amount of natural light is really helpful and can be utilized very appropriately for these kinds of shots. On the other hand, even a slight excess of ambient light can mess things up to where your light trails won’t even show up. Balance is the key, therefore.
Choosing a Suitable Subject
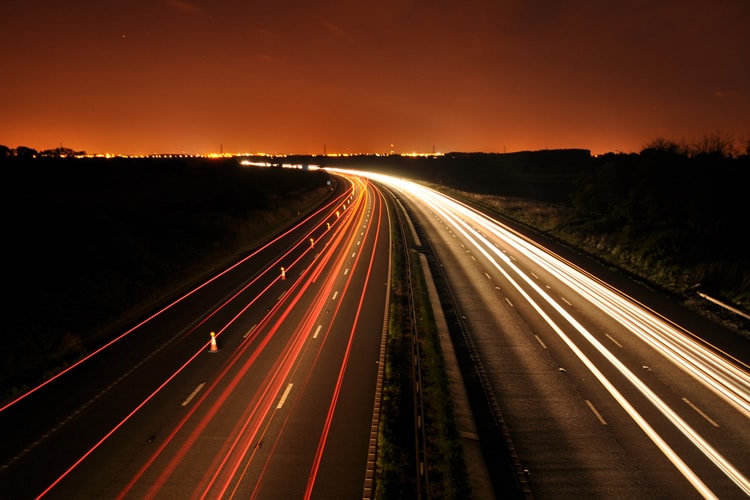
photo by David
Theoretically, all you really need is a stretch of road that enjoys a steady and healthy amount of traffic at night. That’s it! Still, with that said, if the surroundings and the composition are richer and more interesting, that’ll only help the final shot. Some great spots to scout include motorways, traffic islands, traffic-congested junctions and winding roads. If you can, shoot a city center because you’ll be able to use lights from buildings in your shot and improve its aesthetic effect.
It’s also a great idea to first imagine how your light trails will look based on how the traffic is moving in front of your eyes. This visualization can greatly help you with composition and planning the shot. It goes without saying that you should choose a location that has as much light as possible.
If you’re really hardcore about the process, analyze your location in daylight to help you see the main features in the frame.
Then, make sure you pick a place where you can fit in both lanes of traffic in your shot; this ensures that you’ll get white and red light trails, making the shot more vibrant to the eye.
The Shooting Process
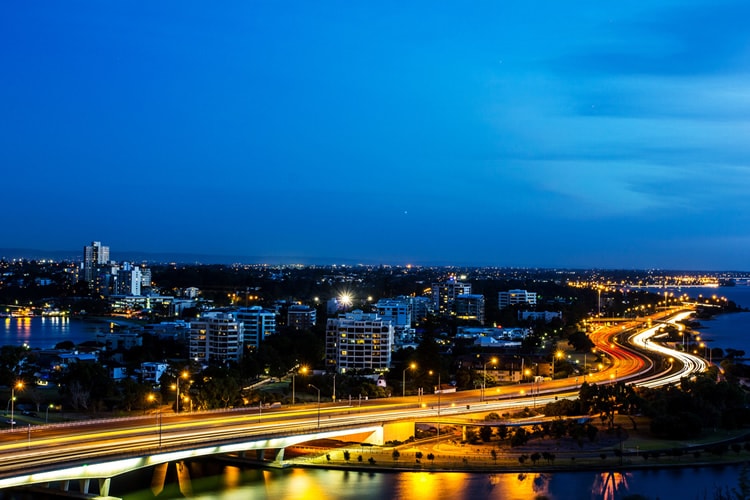
photo by Daniel Lee
Stillness is essential, so it’s best to set up your camera on a trusty tripod. After all, you’re going for a long exposure when shooting light trails. Don’t wait too long when darkness has fallen to begin shooting away; ideally, you should aim for dusk and not later because of the quality of colors present in the sky at that time. Shooting at dusk produces a purplish-bluish color in photos, which naturally just adds more ambiance to your shot.
At the same time, don’t think that shooting when it’s totally nighttime is something you should forego. Try both situations, compare results and go with what you like, in the end.
Now, you have to measure the exposure length of your shot; do this by timing the length of time it takes a set number of cars to drive through your scene. Set the shutter speed to this time. While working in manual empowers you to enjoy greater control over the exposure, you can also try shutter priority, just to see what suits you better.
Above all else, remember this: You must set the shutter speed that you want instead of letting your camera set it automatically.
Using manual mode permits you to set the aperture and the shutter speed independently. Good starting points are an f/8 for your aperture and ISO 200 for the shutter speed. If, after evaluating the histogram and LCD, you remark that the shot came out too dark, then bump up the ISO or set a longer shutter speed.
A good bit of the shooting process will involve trial and error because you shouldn’t expect to strike gold on your first few shots. However, the more you try your hand at this technique, the more you can refine things in the shot and gain confidence. Before long, you’ll be churning out some exceptionally stellar light-trail photos!
Final Tips to Make Your Light-Trail Photos Awesome
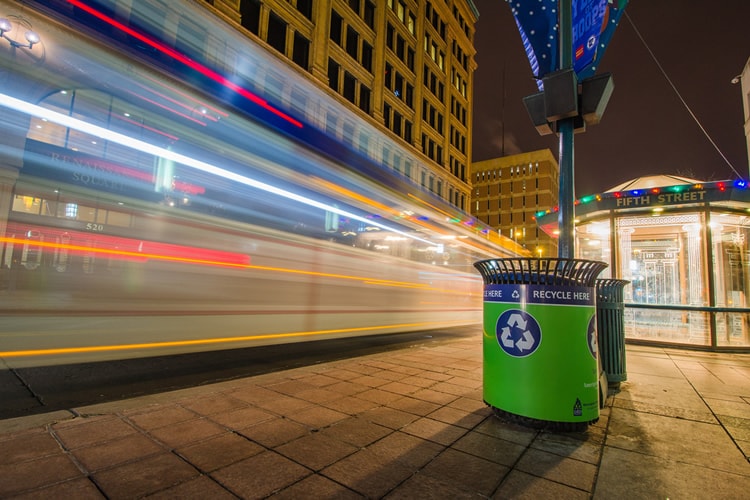
photo by m01229
Here’s a brief roundup of super-useful tips that you can use to further refine your shooting and ensure better results:
- Shooting in RAW: The benefit of shooting in RAW is all about helping you in the post-production phase. You have more control over editing when shooting in RAW. You’ll be able to change the color balance of shots and circumvent color casts from any artificial sources of light.
- Using bulb mode: When your exposures go longer than 30 seconds, you want to use bulb mode in your camera. This way, you can keep your shutter open as long as you need to. Rely on a remote release to open up your shutter, and then hold it open for the necessary exposure time.
Alright, so what are you waiting for? At this point, you have all the basics (and then some) that you need to grab your camera and tripod, find a suitable spot and start experimenting with light-trail photography at dusk. Like all types of unusual or unconventional photography, you won’t instantly be good at this, but that’s where the challenge and fun come into the picture (pun intended)! With a bit of tweaking and experimentation, your light-trail shots will look as stellar as anything that’s ever been produced in this genre.
Have you ever experimented with light trails and traffic before? Have we turned you on to at least trying this technique? Sound off via Twitter or Facebook.
About the Author: Marc Schenker
 Marc is a copywriter and content marketer who covered photography. These days, he runs The Glorious Company, a content marketing agency.