Five Great Tutorials for Using Surrealism in Your Photos
 by
Johnny Dunn
by
Johnny Dunn

It’s difficult to define and give boundaries to what exactly makes a piece of artwork or photograph surreal, but it’s a quality that’s immediately obvious when you see it.
Logical paradoxes, dreamy contradictions, strange creatures and beings that don’t exactly seem otherworldly but are certainly not of this world, these are all iconically very surrealistic things.
But how can you achieve capturing objects and effects that only come from your imagination onto film without Hollywood-style special effects or laborious, expensive studio-work?
This is a list of five ideas to help you get started on taking fresh surreal photographs, along with links where you can find more information and tips related to these camera and photo effects.
Levitate Your Subjects
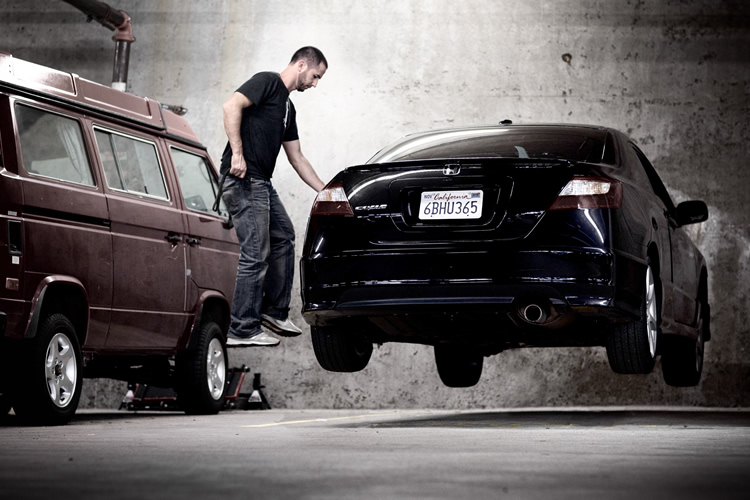
photo by nate bolt
Levitation is certainly an impressive and surreal effect to use in your photography, and the process of achieving this effect is really not that hard at all. All you need is some sort of stool or chair that will be easy to remove in Photoshop later to hold your subject up onto.
Your camera should be in ‘manual’ mode and you should have auto-focus disabled. You should also use a tripod, because you want the position of everything in the two pictures to be as close to the same as possible. One photo will have your levitating subject on a prop, the other should be essentially the same image, but without your subject or prop in the frame.
Then, in Photoshop, open both images up, with the background image being your bottom layer, and the levitating image on top. Finally, click on your brush tool, zoom in, and erase the prop from your top layer. In the end, you will end up with a levitating person or object in your image!
PetaPixel has a full tutorial you can follow.
Blurring
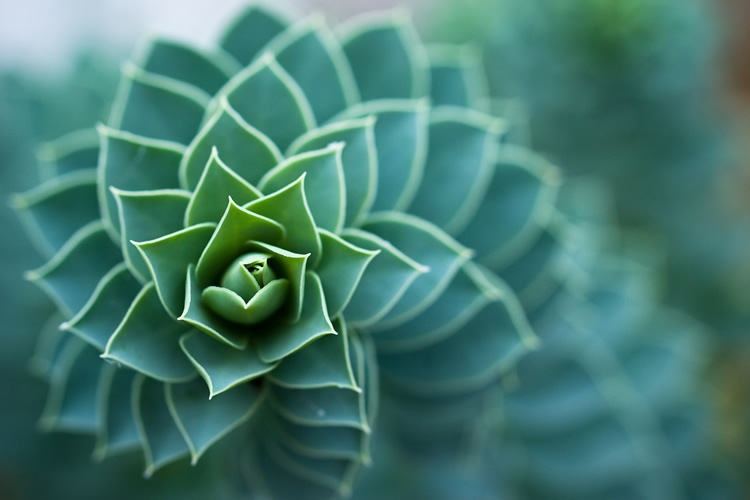
photo by Eric Wüstenhagen
As long as the subject you want to capture is in focus, you can use blurring effects in camera and in post-production to create a surreal atmosphere. In the picture below, every object is out-of-focus except for the few books on the shelf. This makes the viewer immediately focus in on the only clear part of the image, and also hints at a deeper meaning or significance behind the clarity.
Blurring is something you can do both in the camera and in post-production. Lowering the aperture will decrease the depth of field of your image, and you can blur things that are moving during the time you take the picture by slowing the shutter speed. In Photoshop, you can open the image you wish to edit, and duplicate the image layer. Then, select ‘Filter’, then ‘Blur’, then ‘Gaussian Blur’.
This will make your entire image one giant blur. Finally, you use the ‘Erase’ tool to erase the portion of the image that you’d like to be in focus. The duplicated original image will show through the erased parts of the top layer, and you will have the subject you desire in focus while every other part of the image is blurred. Change your eraser feather and size settings in order to get a rougher or smoother eraser.
You can find five more ways to blur parts of your photographs on WikiHow.
Perspective Distortion
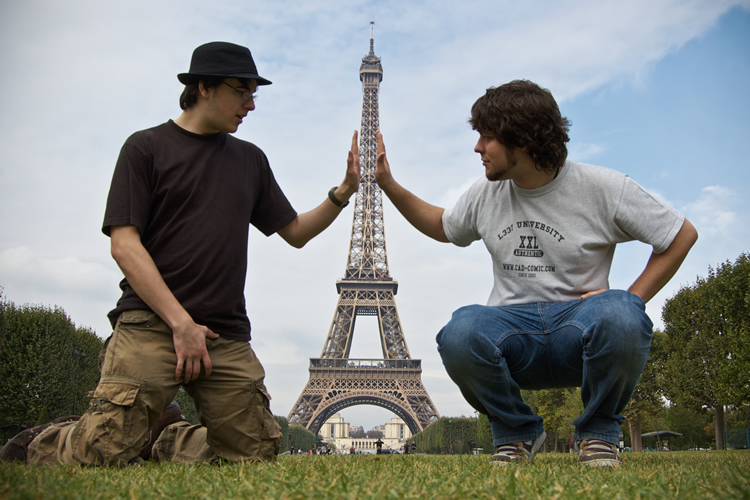
photo by Ben Smith
There are truly amazing things that can be done in photography and in cinema by just using creative camera perspectives.
The Lord of The Rings film franchise uses many examples of perspective distortion, like making the hobbits in the movies seem small by scaling them down relative to their surroundings. One way they accomplished that is by making two different-sized versions of the sets.
They also used forced perspective, that is, optical illusionary techniques to distort reality, which can be as simple as just moving an object further away from the camera to make it smaller, or closer to the lens to make it larger in the frame. By exerting some control and manipulation in the sizes of things in your pictures, you can make scenes that seem otherworldly, bizarre, and contradictory to reality.
You can also change the sizes and apparent distances between objects in your scene by just merely changing the focal length of your lens. Wide-angle lenses can make an object seem larger and more distant from its surroundings, whereas telephoto lenses compress the distance between objects, giving the image a tighter, more constrained feel.
You can find more tips for using forced perspective tricks in your photography on this article by The Photo Argus.
Selective Coloring
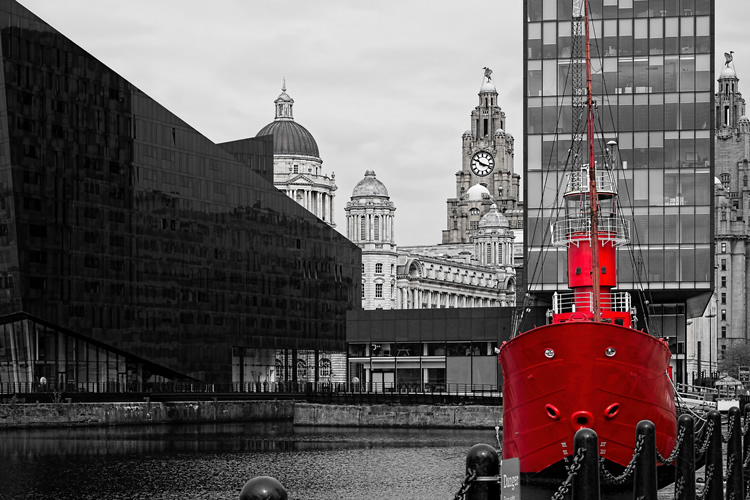
photo by Beverley Goodwin
Black-and-white images certainly can have many surreal qualities to them, but adding in just a bit of
color to carefully selected parts or regions of a photograph can give it an even more fantastical look. An example of top-tier level selective coloring goes to the team behind the Sin City film franchise.
Highlighting certain objects and giving them different tones allows you a multitude of different effects and aesthetics, from a film noir look to the surreal.

First of all, when planning out your shot, remember that you’re going to have to select the subject you wish to remain in color in Photoshop using either the Quick Select tool, Magic Wand, the Lasso tool, or the Pen tool.
Once you have all of the regions of your image you want outlined, find the ‘Select’ menu in the menu bar and scroll to and click ‘Inverse’. This will invert the areas that you selected, now allowing you to simply convert the newly selected area to black-and-white by turning the saturation down all the way using the ‘Hue / Saturation’ option.
You could also add a ‘Black & White Adjustment Layer’ by simply choosing it from a list that appears when you hit the ‘New Adjustment Layer’ icon.
For more tips and visual images to help with your selective coloring, read this great tutorial from Photoshop Essentials.
Proper HDR Imaging
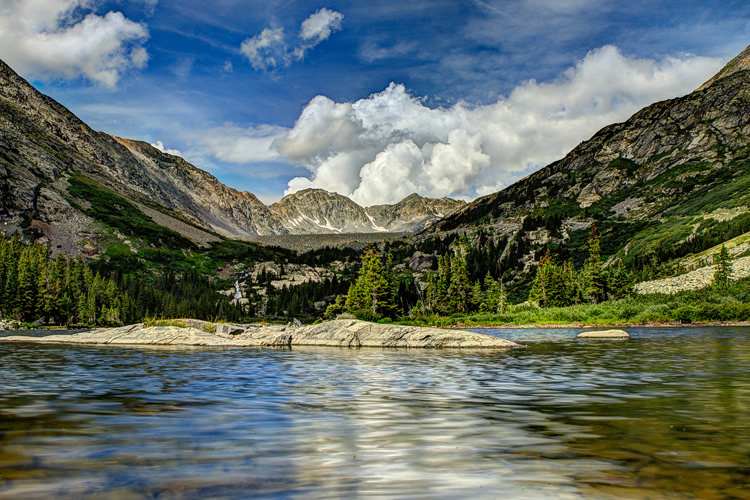
photo by Dave Dugdale
While faux HDR techniques, most notably generating an HDR image from a single raw file, can certainly result in some very surreal and dreamlike effects, it’s no substitute for the real thing.
Generally, these faux HDR techniques aren’t very subtle at all, and they often cross the border from surreal to fantastical. Surrealism is not the same as science fiction.
It’s very necessary to use a tripod or some sort of very stable mechanism for taking HDR images, and for best results, always shoot in RAW format.
Then, you should find the automatic bracketing exposure settings on your camera, and change it to either +/1 or +/2 or even +/3, depending on your judgement based on the scene and lighting.
If there’s a lot of tonal range in your composition, you should use a higher bracket setting, or you should take more photos at different exposure settings.
You have to make sure that the only thing that changes your shutter speed though, not your aperture or ISO, as the images must be entirely consistent in everything but their exposures. This is why you need the tripod, so none of your subjects move. If your subjects are moving, you will get lower-quality or even unusable results.
You should be in Aperture Priority mode when using the automatic bracketing exposure setting to keep a consistent aperture, or you can adjust the shutter speed yourself in ‘Manual’ mode.
Once you have all the raw images you need, you should open them up using an automated HDR composite software. PhotoMatix and Photoshop are pretty much ranked the best. In Photoshop, just go to ‘File’, ‘Automation’, and ‘Merge to HDR’.
From there on, you can make your own adjustments or choose from a list of default merging settings. Be careful not to overdo the compositing and tone mapping though, otherwise your HDR image will start to look like a bad CGI effect.
But when done well, HDR imaging can produce exceptional photographs that have rich tonal ranges and textures that normal photographs would not be able to reveal, even from a RAW image if there’s just one. It can be dizzyingly beautiful to see some of these pictures, and oftentimes certainly very surreal.
Conclusion
Surrealism is one of the wildest and most visually provocative cultural movements ever. There’s been a rising trend in surreal, dreamy atmospheres in film, photographs, and art alike, and there are many techniques to be used and trained in a surreal artist’s arsenal.
About the Author: Johnny Dunn
Johnny Dunn is a freelance writer located in NYC, and is also currently working at the advertising and design agency Breakneck Imaging as a residential photographer and copywriter.