8 Tricks For A Successful Sunny Mid-Afternoon Shoot

If you have been into photography for any length of time, you know that the mid-afternoon sun can be quite harsh. This is the time when the sun is at its peak.
For photographers, this means dealing with overexposure coming from the sun.
It can be challenging to control shadows on the faces of your subjects.
While most photographers prefer to avoid harsh lighting conditions, some love a little challenge and like the idea of going out under the sun to take photos.

Others may not have a choice because it is their only time to take photos.
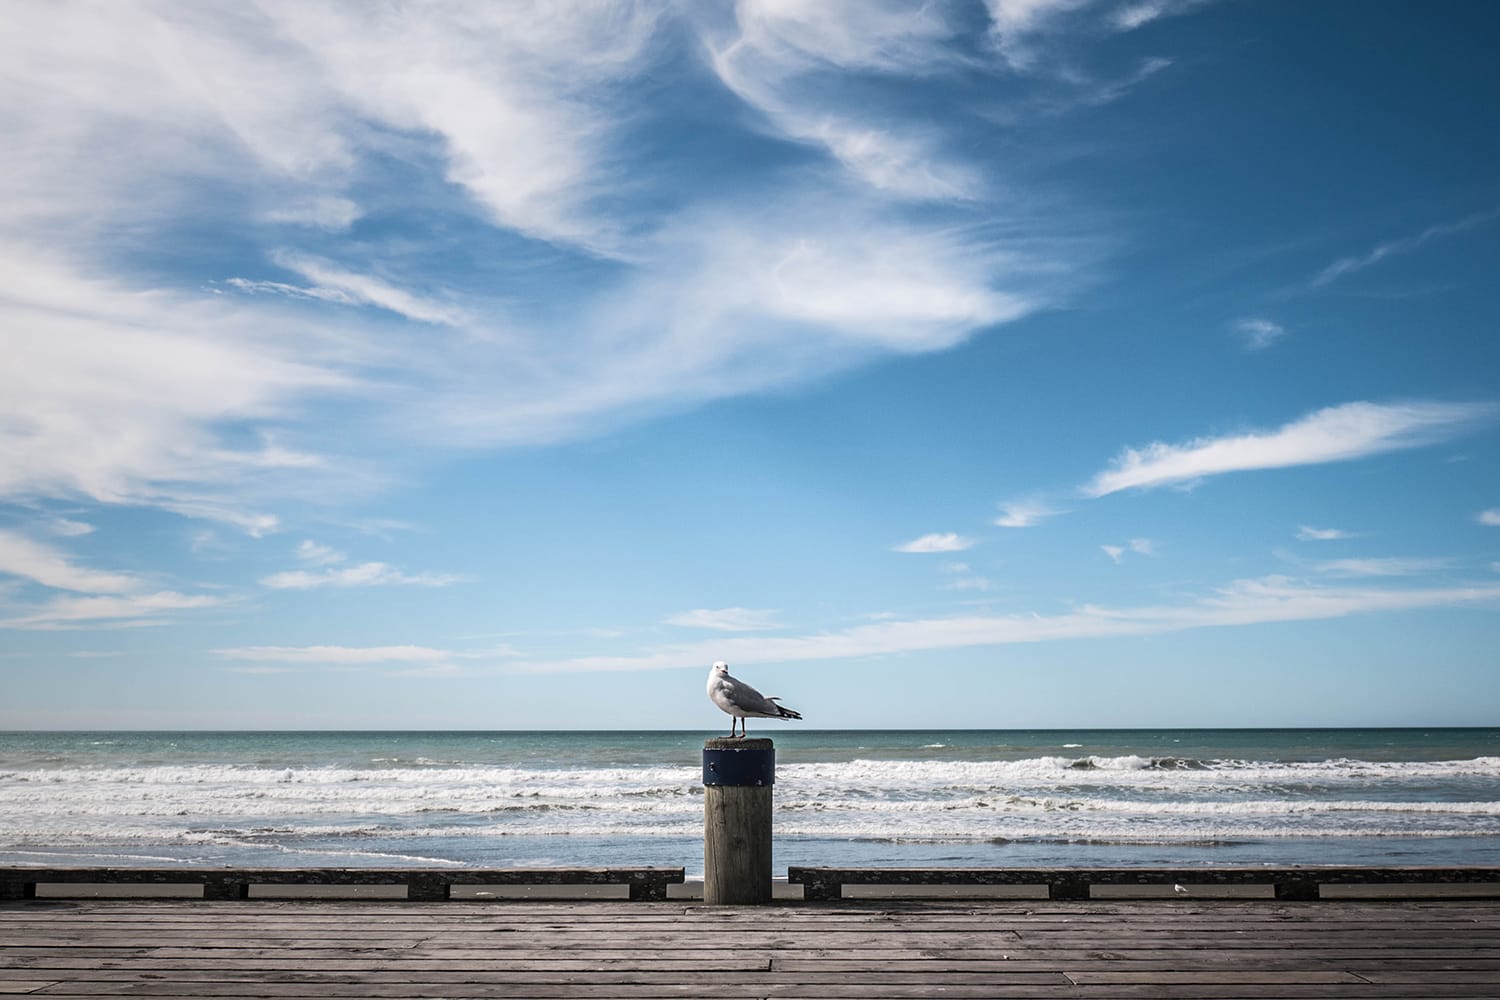
For example, you need to take pictures of an event that happens at noon, say a birthday happening in the outdoors or a company event at midday… there is no avoiding the harsh and direct bright light of the sun in situations like these.
One advantage of taking photos in midday is the sun’s effect on reflective surfaces. If you go out at noon or mid-afternoon and shoot a clear blue river, then it will appear clearer and more transparent in the photo. This is because of the direct light from the sun penetrating the water.
If shooting under the sun bothers you, there is no need to worry. There are things you can do – simple tips and tricks – that can help make the situation a bit better and easier to handle.
Tips and Tricks for Taking Photos at Noon Time
Light is one of the most important elements to master in photography. No matter how good you are at composing shots, you won’t be able to come up with the images you envision if you do not understand light and its role in photography; if you do not know how to make good use of lighting.
The quality of light affects the outcome of your photos. It is light that gives your images that dramatic, magical, and dreamy look. If you shoot in the middle of the day, when the sun is “burning,” achieving such type of photos can be quite tricky – unless you follow these simple tips and tricks.
1. Look for shade or a shady area to position your subject

Positioning your subject by the shade will help prevent overexposure, as the background can be too bright or too sunny. Be sure to find a shade that’s not too dark, though. Some good examples are leafy trees, tall buildings, and even canopies.
If you cannot find any shade, unleash your creativity by creating your own. All you have to do is use a diffusion panel. Place this panel between the direct light of the sun (overhead) and the subject. For convenience, bring a stand that can comfortably hold the panel in place.
If you do not have a diffuser, go for a translucent umbrella (which is easy to find nowadays).
2. Place your subjects with their backs to the sun

This is a simple tip that a lot of photographers – hobbyists, newbies, and professionals – often forget. This is particularly true if you cannot find any shade where your subject can stand. If you apply backlighting, your subject won’t be facing the direct glare of the sun, so there won’t be any squinting of the eyes.
Besides, this means there won’t be sunspots anywhere near the subject – and the shadows won’t cover the face.
3. Move close to your subject when taking photos

Want to make those big shadows disappear? Move as close as you can to your subject before taking the photo. Likewise, doing so will help make details and background clearer. This works especially well when posing couples, too.
You see, when the sun’s harsh lights directly hit the image, its background will look like a blur, so the viewers won’t be able to see the detail.
4. Pay attention to the clouds
It may be a sunny day when you shoot, but you can get lucky sometimes when clouds roll by. These puffy white wonders can serve as a softbox for you. The minute you see some rolling by, grab your camera and shoot as much as you can.
5. Take advantage of the flash

Even if it’s extra bright at noontime, the fill-flash can still do wonders for your photography. Use the flash to counter unwanted shadows on your subject’s face. It will also help create some depth and detail to your images. You can of course also use an off-camera flash and place it in the ideal location so it counters the sun.
Your flash can be your savior and overpower the harsh effects of the midday sun. It can also be a good fill light. Bring one or two to your sunny mid-afternoon shoot if you want to fight off the direct overhead bright light coming from the sun.
6. Pay attention to your ISO
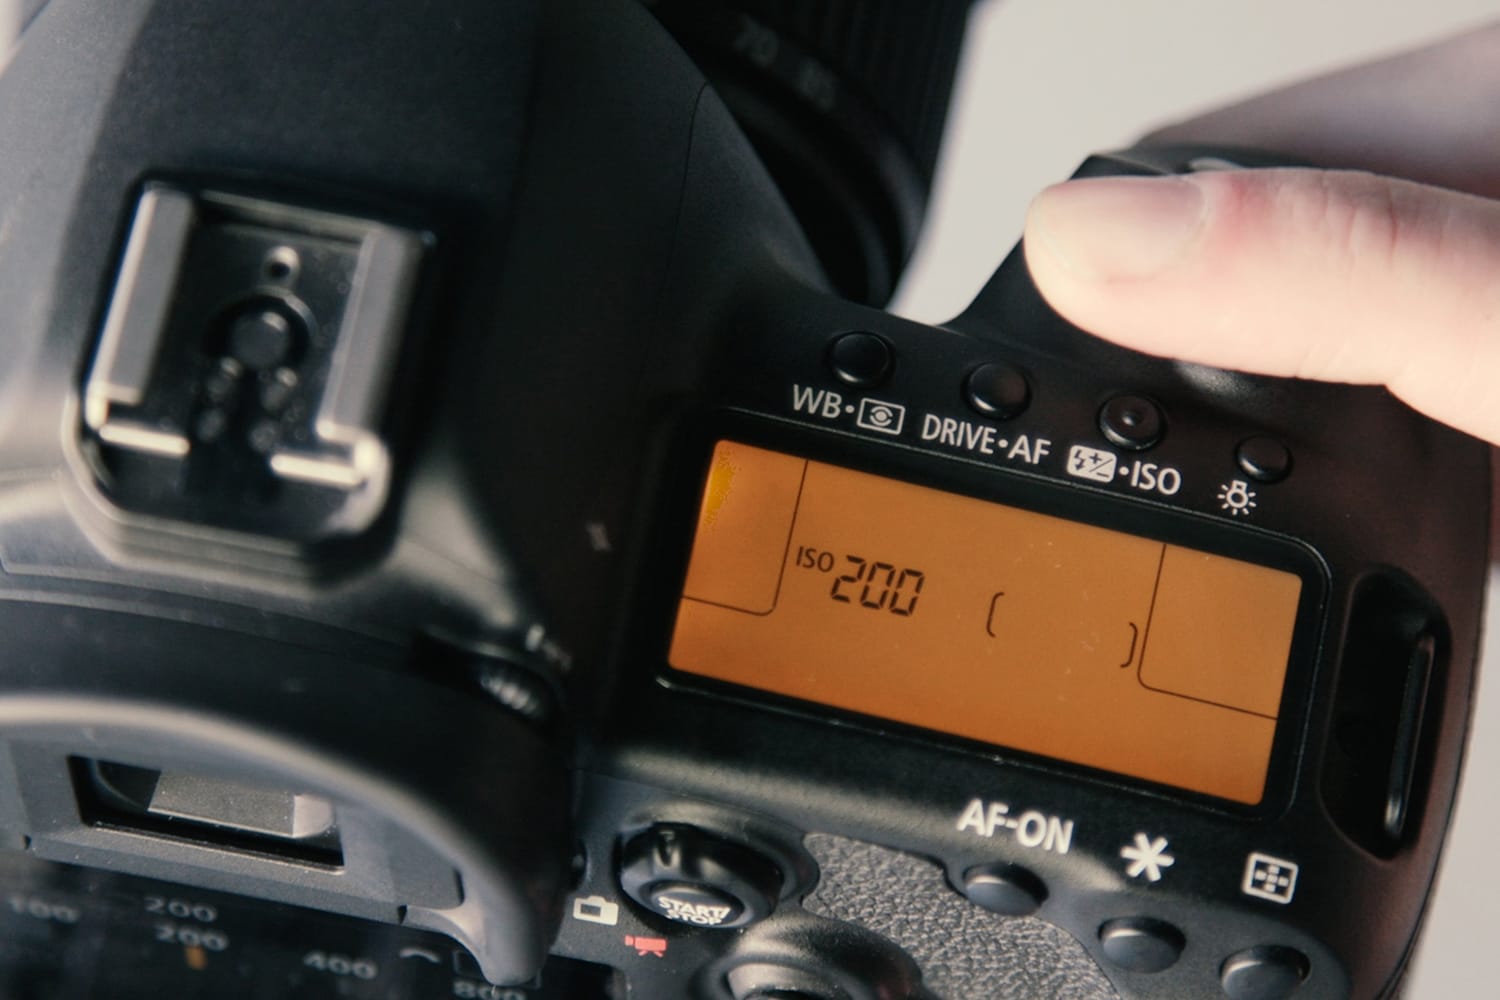
The harsh afternoon sun likes lower ISO, so be sure to set your camera to ISO 100. Nothing above ISO 1000 if you do not want to deal with washed-out images. You can also snap a neutral density filter on your lens and use it to bring down your shutter speed. This will give a livelier photo.
7. Take action shots

Take advantage of the bright light and fast shutter speed. Some examples are a kid jumping into a pool, a dog running on the beach, and some people playing volleyball by the beachfront.
Be sure, however, that the sun is behind you so you can highlight the subject in detail. If you want dramatic silhouettes, the sun should be behind the subject.
8. Finally, take practice shots before going for the final one
It will help if you take the time to study the location and then take a couple of practice shots. This will give you a chance to not only familiarize the place but also determine which kinds of shots will work well for you.
These tips and tricks make shooting on a bright sunny day a little bit easier and more fun. Keep them in mind, and with practice, midday shoots will no longer bother you!
About the Author: Michael Gabriel
 Michael Gabriel L. Sumastre is an experienced writer who loves to take pictures of the countryside as well as aerial photographs. He maintains his professional writing portfolio at TheFinestWriter, and you can visit his photography portfolio at Sumastre Photography. Michael was hired by Booking.com to photograph 10 of the most beautiful beaches in Palawan, Philippines.