Getting Started with Skylum Luminar: Tips & Tricks for Enthusiast Photographers

Launched in November 2016, Luminar is a photo editing software or application developed by Skylum (formerly Macphun). It is available for both Windows and Mac OS.
In the very beginning, Luminar was developed only for Mac. But in late 2017, Macphun launched Luminar 2018 for Windows. In the meantime, the company decided to change its name to “Skylum.”

Luminar can be used as a plugin for Adobe and Apple products as well as a standalone application. Luminar integrates with Adobe applications, including Adobe Photoshop and Adobe Lightroom Classic. It also integrates with Photos for Mac.
Luminar won a gold award in 2019 for its work and innovation in the photo editing space at Digital Camera Grand Prix. In 2019, the EISA awards declared Luminar the best photo software product. Luminar also has filters (called “Looks”) used for editing, and the software directly works with raw files.
In November 2019, a new version of Luminar was launched, which was Luminar 4. Some new brilliant features like automated sky replacement and some other AI tools were introduced in this update. Luminar AI was then launched in 2020.
Luminar comes with brilliant & outstanding tools and features. In fact, it has more editing tools than a lot of other software. Moreover, the best thing is you don’t need to be an expert to use it. It is very easy and straightforward.
Of course, buying into an ecosystem like Adobe Creative Cloud has some benefits as their software integrate with one another and they have a myriad of apps for various situations. From photo to video editing, PDF creation, multiplying fractions worksheet, and so much more. But, Luminar is still a robust piece of software and more and more photographers are flocking to Skylum because of the high quality and robustness of the software.
So… why should we use Luminar?
Unique technologies and AI tools
Luminar helps you create incredible showpieces in many photography genres like travel, landscape, portrait, and many others. It provides users many exclusive tools like AI, Sky replacement.
Easy to use
To start using Luminar, you do not need to spend years learning it. Luminar was designed to be as intuitive as possible. Just open the application and start editing. Even their official landing page has a 5-minute video tutorial on how to start using Luminar.
No monthly payments – pay once, own forever.
If you are fed up with the monthly charges of other editing software, then Luminar is the best choice for you. There is no need to worry about monthly and yearly bills. Once you purchase it, the software is totally yours, with 24/7 support and free maintenance and updates. Obviously, new versions might be paid upgrades, but still, the software is yours.
Let’s go through some of the best features of Luminar, shall we?
AI enhance feature: It analyzes your photo and then makes a smart decision about exposures, contrasts, saturation automatically.
Sky Enhancer: If your skies need a helping hand, then you can use the feature.
Rotate, Tilt, and Bend to perfect shape: Luminar can help you fix distorted photos very easily by using the lens and transform tools in the Develop filter.
Using Lookup Tables with custom presets: You will be able to use and save lookup tables as a preset in Luminar. Luminar opens a whole new world of creative possibilities.
Remove objects: You can easily remove objects using the “clone and stamp” or “erase” features.
Discovering lost details in your image: Recover details in your photos’ shadows and highlights using the recover features in Luminar.
Fixing Color balance: You can adjust your images’ color balance using Luminar in a few seconds.
White Balance: White balance is key to getting accurate color in your digital photographs. This can be adjusted right within Luminar 4.
Here’s a summary of some other key tools and features you’ll find in Luminar.
- User-friendly interface that you can use for an easy workflow.
- Workspaces for quick access to the editing features you need
- Enhance your images in one-click.
- Many “looks” (filters/presets) to edit, enhance, and change your photos.
- Incredible object removing and clone and stamp feature.
- Cropping and transforming.
- Noise Reduction.
- Blend modes Layers.
- Textures of your choice (custom texture).
- Non-destructive editing.
- RAW processing and convertor.
- A panel remembering your history.
- Support for many popular file formats such as RAW, JPEG, TIFF.
- Extensions and plugins support.
- Batch-processing and social sharing.
Luminar tips and tricks
Let’s go through some tips & tricks that can help you take advantage of all that Luminar has to offer!
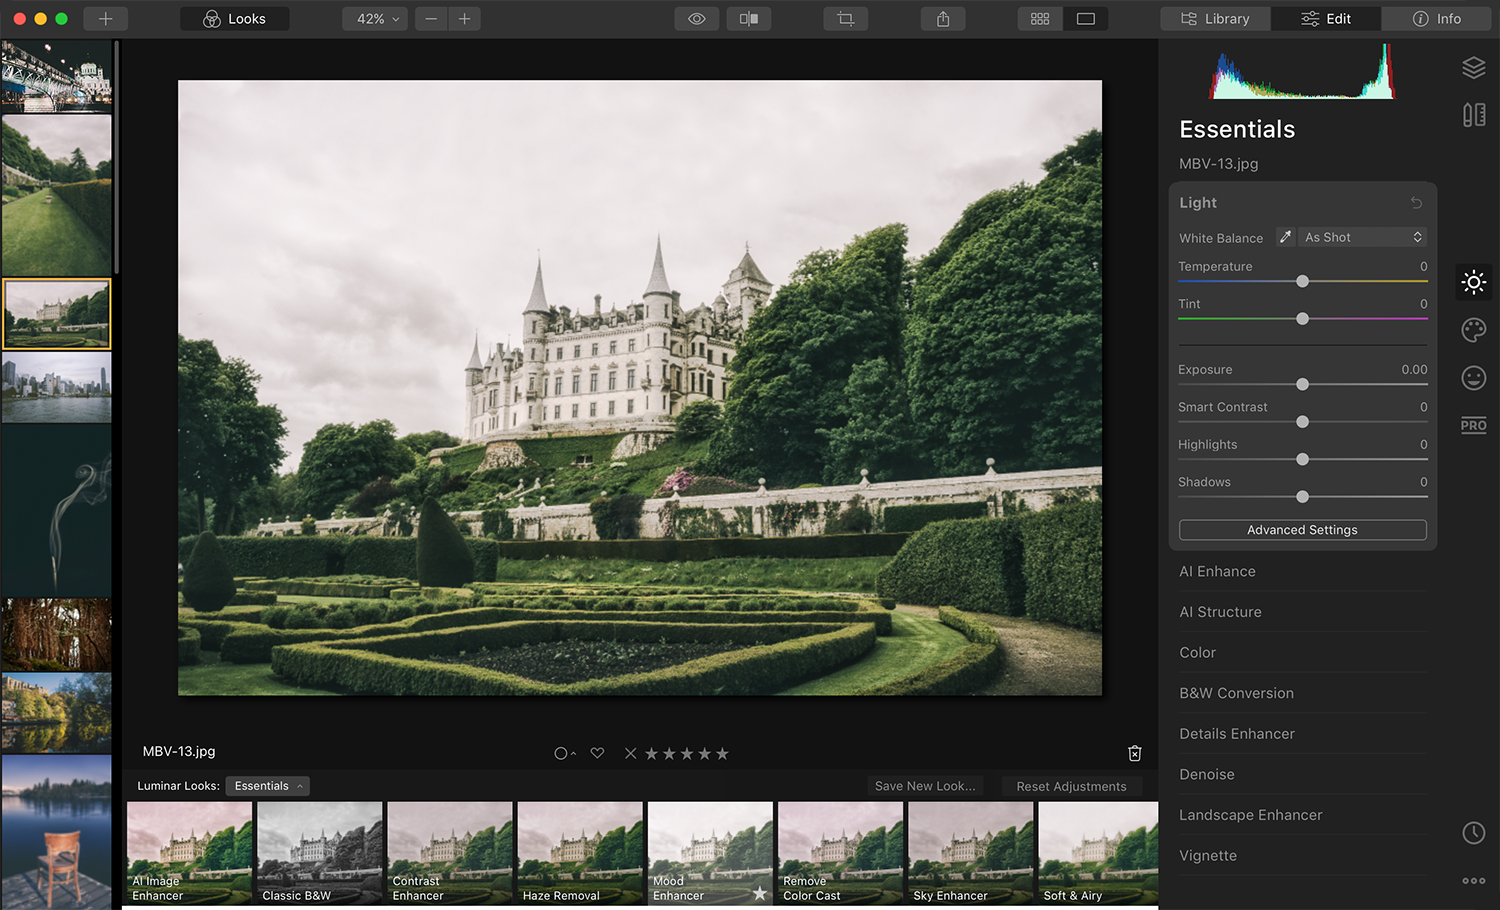
1. Profiles:
You can install Profiles by going to Essentials > Light > Advanced Settings. Profiles allow you to easily change the color tone and contrast of your image. Every RAW file has its own profile, and Luminar will enable you to load a custom profile. If you’re familiar with Adobe’s Creative Profiles, you will feel right at home using this feature.
2. LUTs:
LUTs are a lot like profiles. Simply navigate to the Creative Tab, then click Color Styles > Choose LUT > Load Custom LUT file.
You can change the LUT’s saturation you’re applying as well as apply the LUT to a specific area of your image. Besides a lot of default LUTs, you can also use custom LUTs.
3. Use the Amount slider when using Looks:
If you are using Looks in Luminar, then you can see there is an amount slider built-in. This slider can be used to adjust the intensity of the “look“. It’s similar to the amazing Opal plugin for Lightroom Classic.
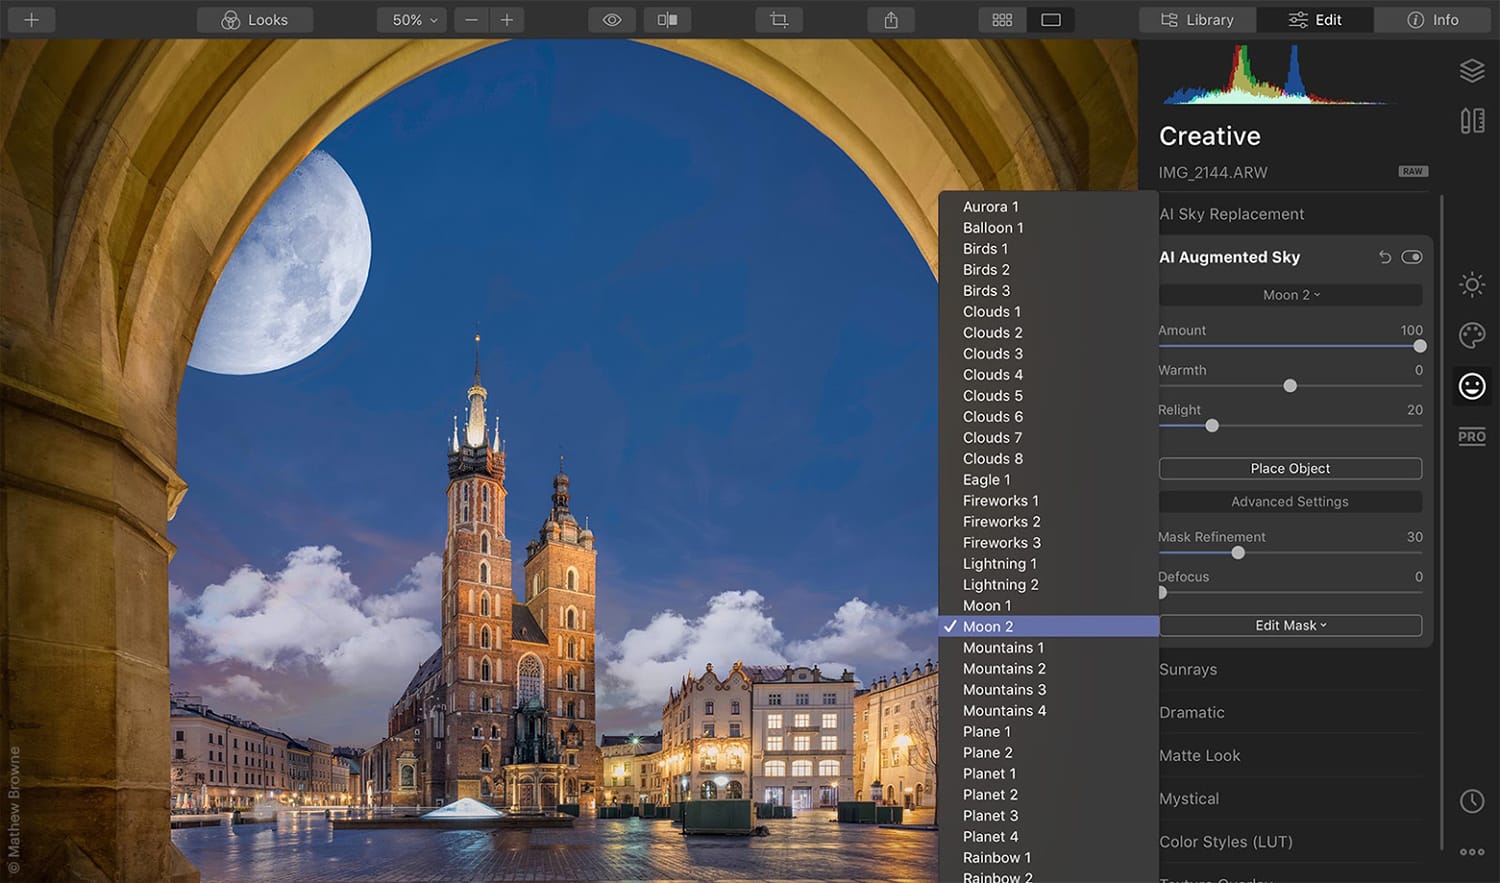
4. AI Augmented Sky:
If you shoot landscapes, you are going to love this feature!
The AI Augmented Sky will automatically detect the sky in your photo and allow you to position an element inside the sky area. For instance, you could add a moon to your night sky.
I hope you found those tips & tricks useful!
About the Author: Jon C. Phillips
 Jon C. Phillips is a photographer, watch lover, product developer/designer, guitarist & musician, and all-around web nerd. He's the founder of Contrastly which he launched in late-2012. He also co-founded DailyPhotoTips and TheDailyPreset.