The Top 10 Lightroom Tips for Your Success

Lightroom is the premiere editing software from Adobe. It’s used by photographers, content creators, and digital nomads across the globe. Part of the Creative Cloud Suite, Lightroom offers an easy-to-use interface and reliable modules for culling, editing, sorting, and processing images.
It has a low barrier to entry for artists and photographers looking to edit their images with ease. Lightroom also offers hidden workspace features that are conducive to an even faster workflow and stellar photo deliverables.

Lightroom Classic vs. Lightroom CC
Please note the following tips apply to Lightroom Classic, the original version of the software that contains all the bells and whistles you need while editing your photos. Classic was specifically made for pro photographers who edit on a desktop or laptop computer.
It lets you save images to your local computer’s drive and get more creative with your edits.
Lightroom CC, on the other hand, is a cloud-based photo service. It is predominantly a mobile and web-based app that also allows you to edit your images. It offers great cloud storage but far fewer editing options for professionals.
While you may already know some secrets that Lightroom offers, here are ten additional Lightroom Classic tips and tricks that you may not know off the top of your head!
When used correctly, these techniques will help take your editing, workflow, and ultimately your photos to the next level.
1. Solo Mode
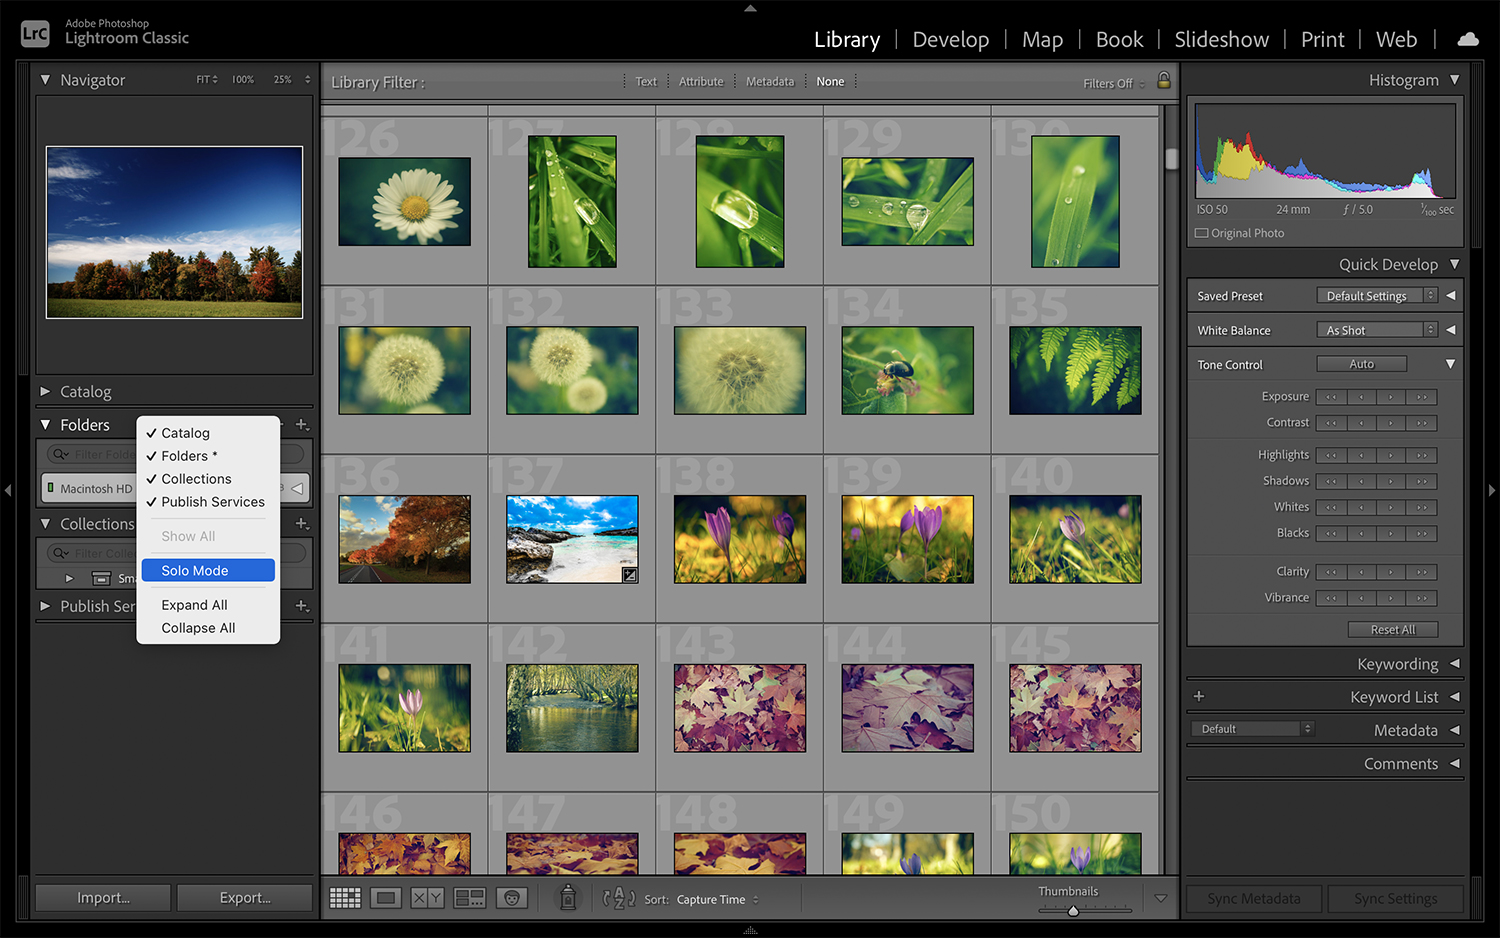
Most pro photographers who have been using Lightroom for an extended amount of time are familiar with Solo Mode. This option makes your panels easier to navigate so that you’re not spending as much time scrolling and instead spending more time focusing on what needs your immediate attention when editing.
To activate Solo Mode, right-click on any one tab or panel in a module like Tone Curve, Lens Correction, or Effects (in this instance, found under the Development module). Then click Solo Mode to show only that panel. This useful Lightroom editing technique lets you quickly navigate between panels without fussing over what else is open.
2. Custom Presets
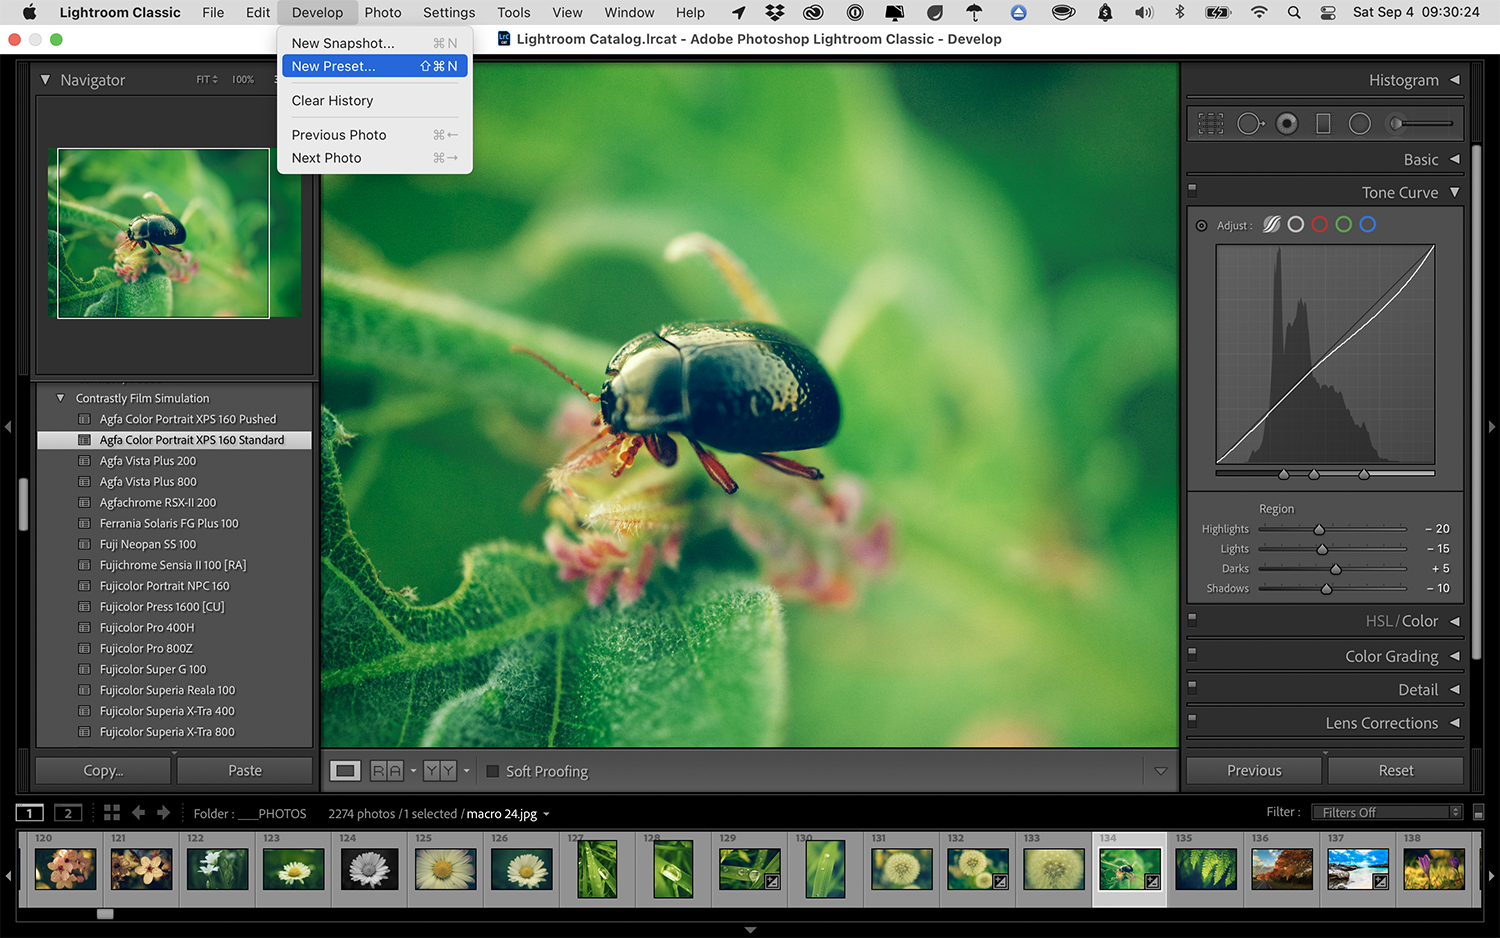
Custom Lightroom presets are a must for any photographer or content creator who has the perfect editing formula they want to save or share with the world. They can be made quickly and easily.
First, finalize your Lightroom edits. Then click on the Presets panel under Develop, and click on the plus icon. Finally, pick a name, save your custom editing features, and select a group location for your preset.
That’s it! You can now go to the Presets panel, and you’ll see your preset in the saved group of your choice.
3. Auto-Adjust/Auto-Tone
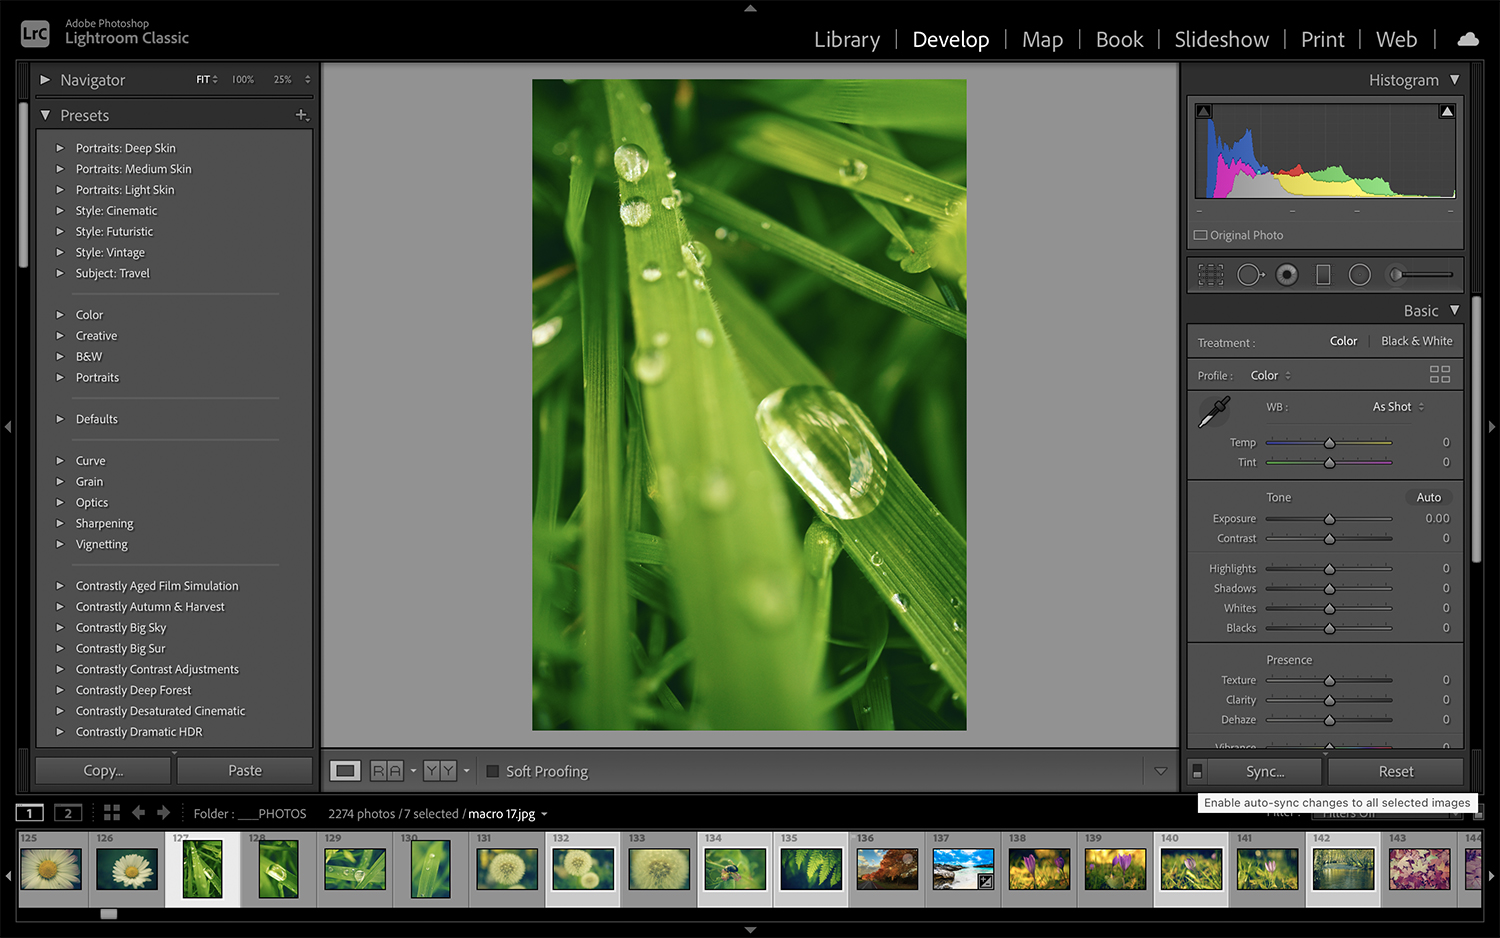
If you have a group of photos with different image settings that you need to edit on the fly quickly, auto-adjust/auto-tone is your new best friend.
Don’t individually select adjustments, sliders, or the auto buttons while selecting one or multiple photos (which can lead to awkward exposure or coloring issues between sets of images).
Simply select the photos of your choice, and then hit the small switch next to sync on the Develop module. This will enable auto-sync with all the images you’ve selected, based on their unique color and exposure profiles. Now, when you hit auto tone, the auto toning will apply to all the photos you’ve selected and adjust for each one individually. Pretty cool, right?
This is helpful when you have multiple photos with different exposure settings that you need to fix or edit based on their individual parameters.
4. Panel Reset
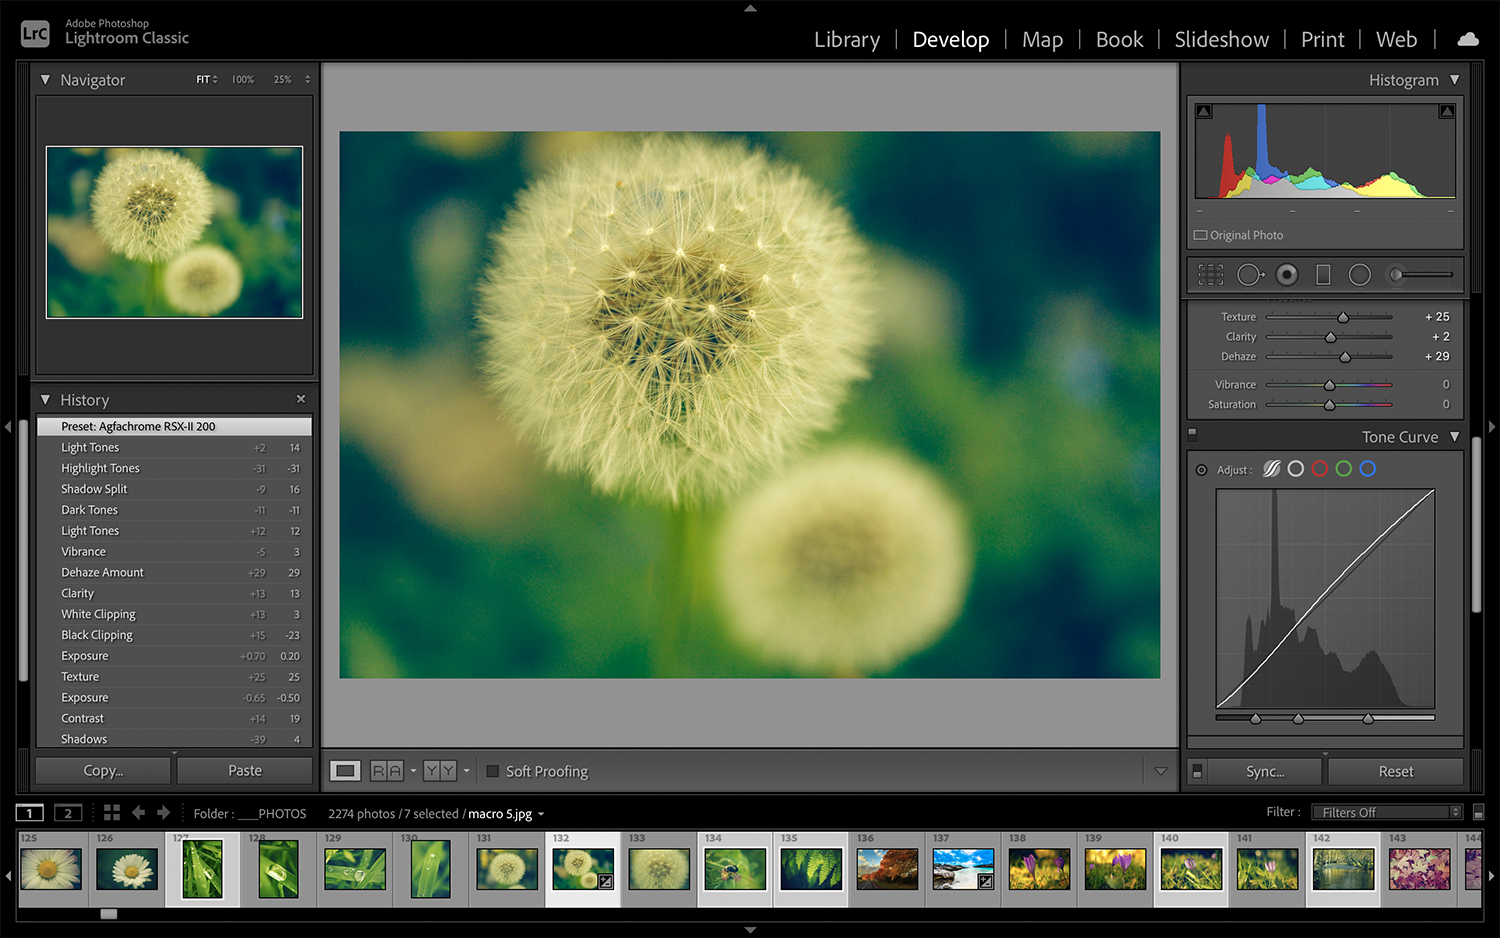
There are several ways in Lightroom Classic to undo your edits or go back to a previous version of an image. Knowing these can be valuable time-savers when you’d like to readjust or compare your original image to your current edit.
Here are a couple of examples. The simplest shortcut is to simply hit Ctrl/Cmd Z to undo the previous step.
If you want to reset all the sliders in a panel, you can double-click the panel name like “Exposure” or “Tone.” You can also use the History panel to see your changes in sequential order and decide how far back you’d like to go through your editing history. Finally, clicking in the History panel on import will magically take the image back to how it was when you first started editing.
5. Decrease Slider Sensitivity
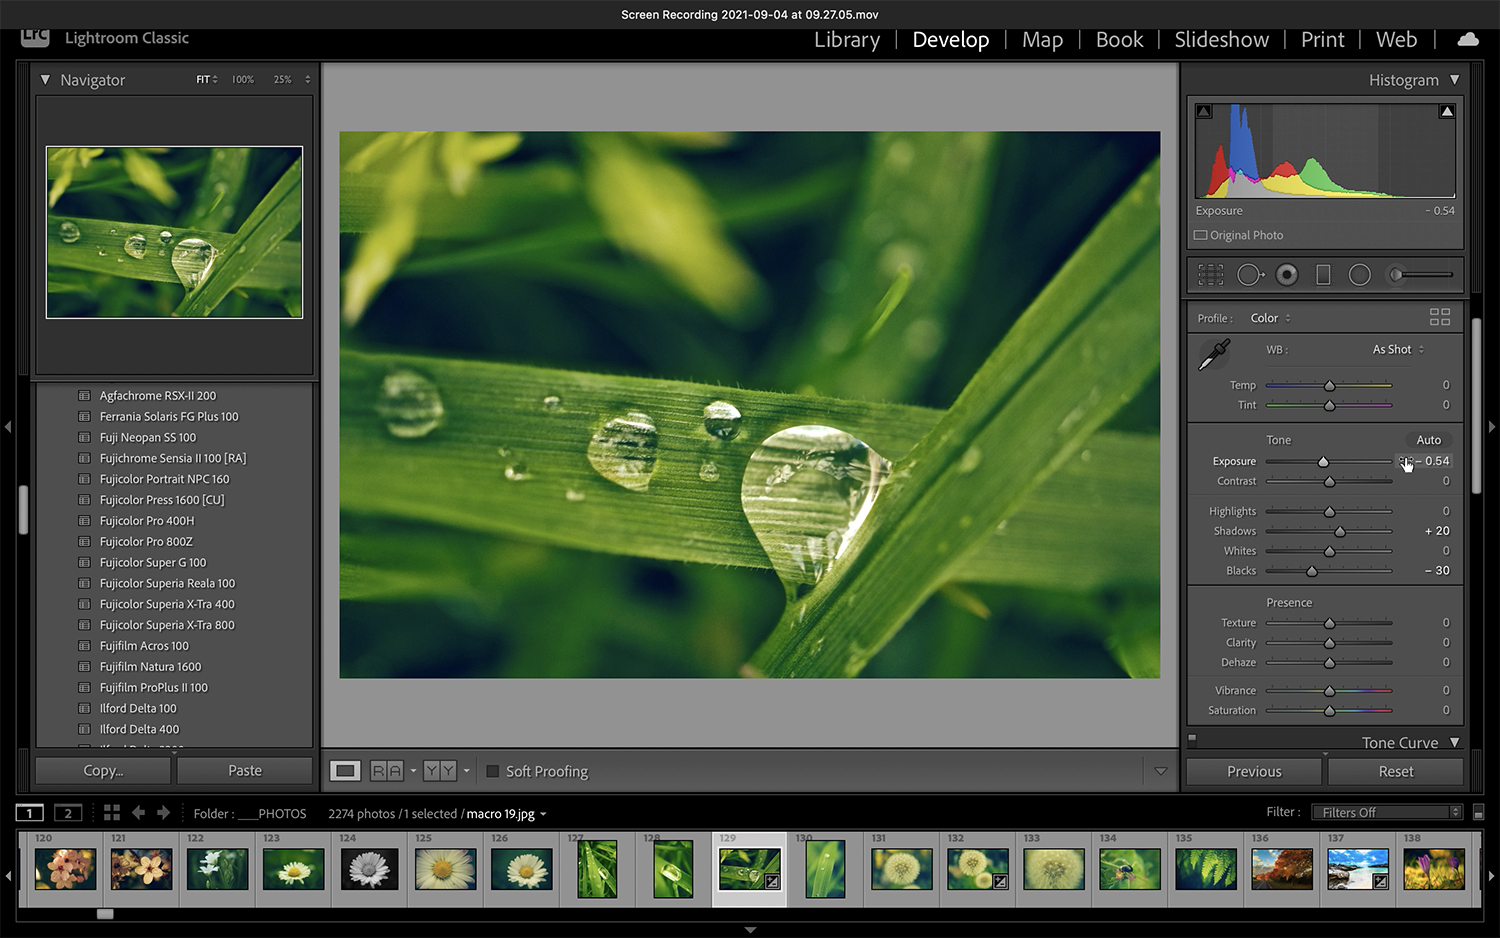
Have you ever felt as if the sliders in Lightroom are a bit too sensitive to the touch? Well, we have a solution for exactly that problem. It can be tricky to correctly get your desired edit when you move the sliders like White Balance or Exposure. To make this easier for you, Lightroom offers a way to decrease the sensitivity of sliders.
Simply go to any slider and move your cursor over the numerical value on the right of the slider. This will activate a scrub version of the slider that will give you more refined movement. This is indicated by a small hand icon with a left/right arrow. When in this mode, simply scroll left or right to adjust the slider in single digit increments (vs ±5 when using the slider itself.)
While hovering, you can also use the down and up arrow keys on your keyboard (together with the shift command) for smaller numerical increments.
6. Curve Adjustments
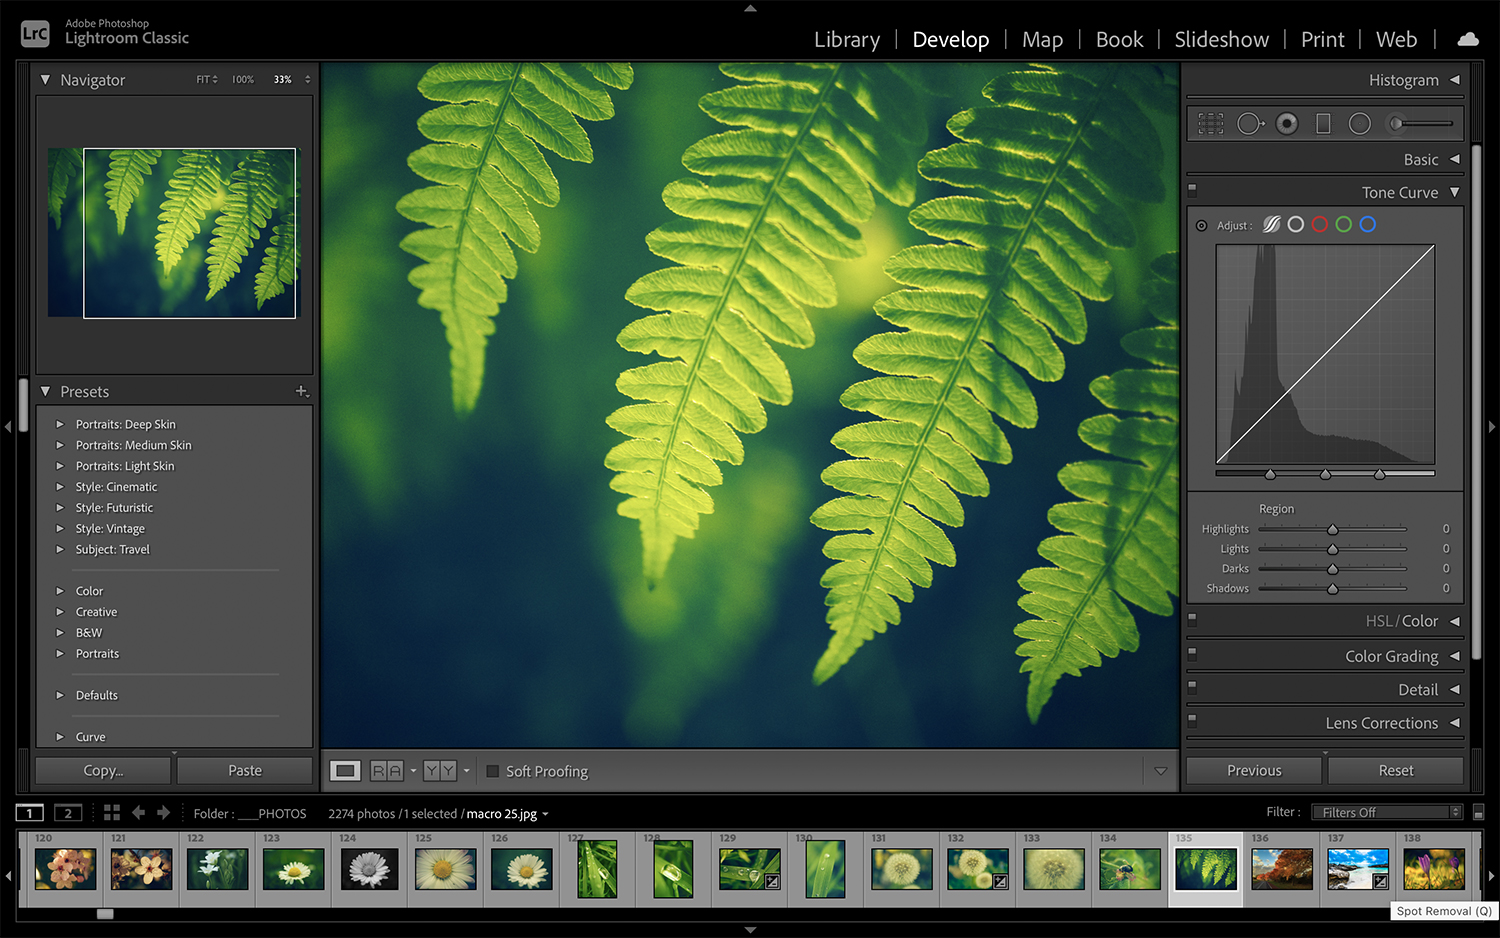
Curve adjustments allow you to have a greater handle on color and light. Composed of light/dark, red, blue, and green channels, you can make edits by moving the tonal curve line up and down and adding points to your curve line that will greatly impact your image to the degree that slider adjustments can’t fully match.
This is especially important for anyone who wants to have more control while editing in Lightroom. Although many photographers initially shy away from curve adjustments out of intimidation, it becomes quite intuitive once you start using curves to edit.
7. Batch Editing/Copy Editing
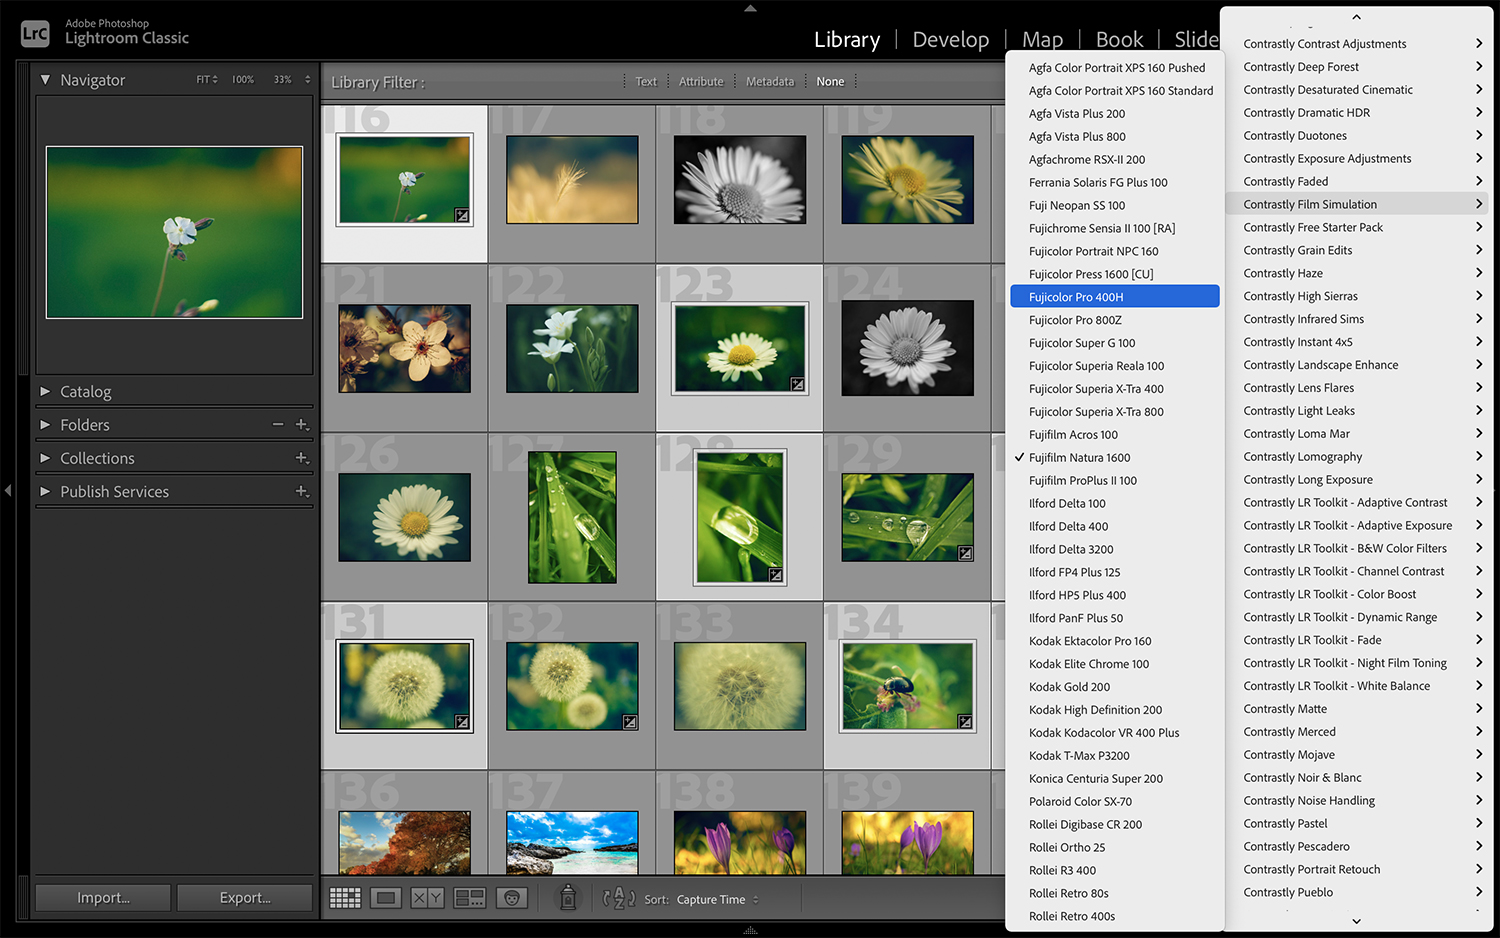
Our Lightroom tips wouldn’t be complete without batch editing. Lightroom is the quintessential photo editing software that is made for group edits. You have several options when applying your adjustments from one photo to another image:
- You can apply an edit during import by choosing the develop settings when you initially bring your images into Lightroom.
- You can also apply multiple presets to images in the Library module by selecting a group with Ctrl/Cmd and choosing the preset of your choice under the Preset drop-down menu.
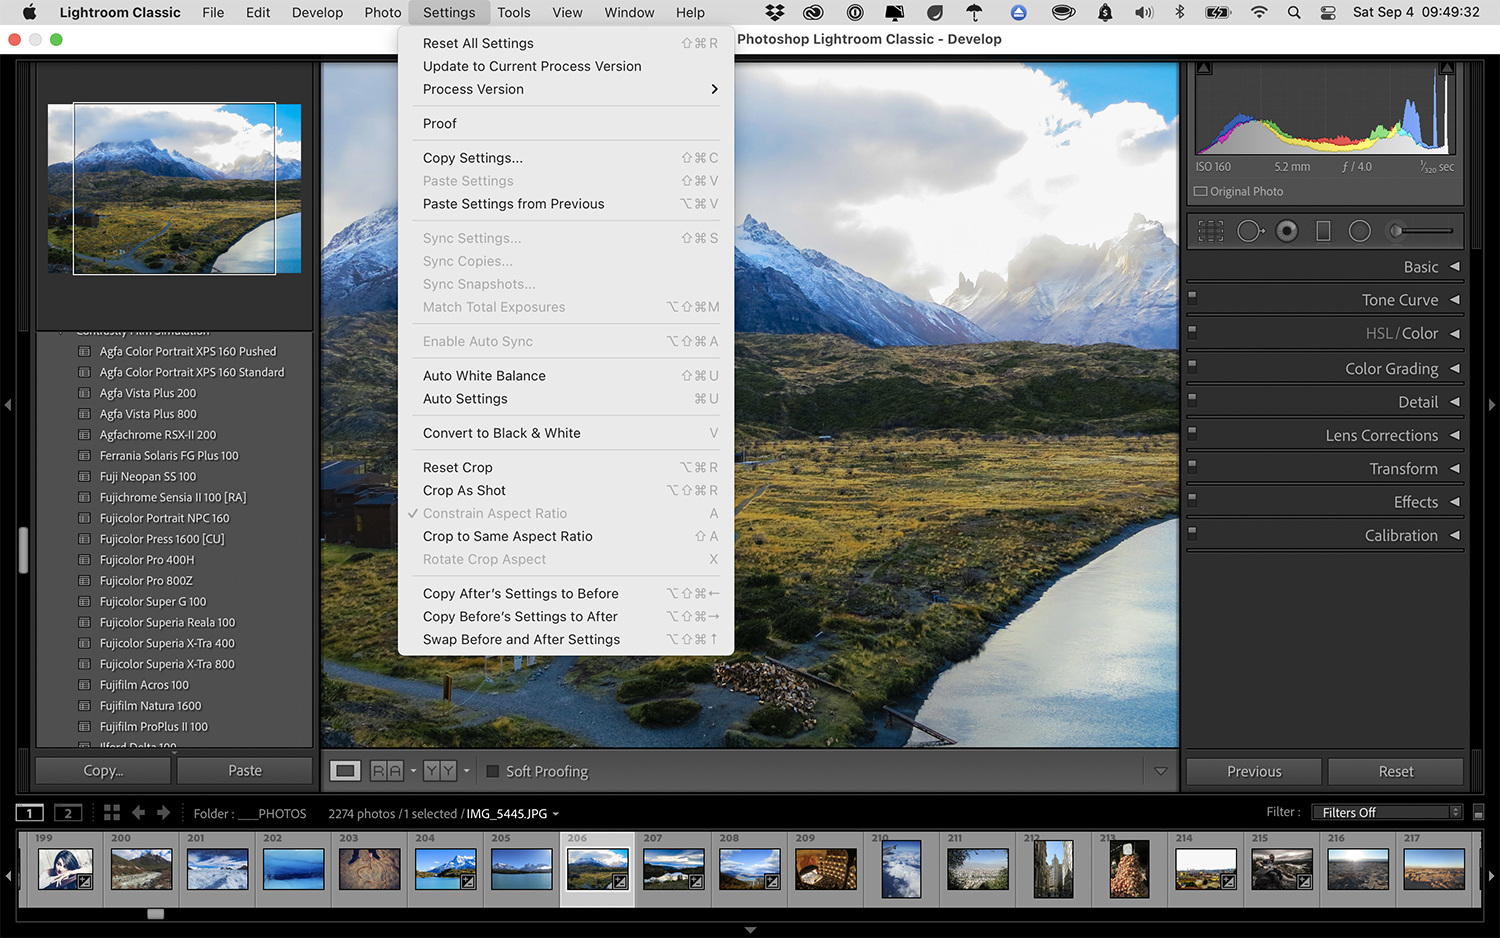
- You can also edit a photo and hit Ctrl + Alt + V or go to Settings, Paste, Copy Settings from Previous to place your previous edits on a new photo for a simple copy and paste interface.
8. Highlight Clipping
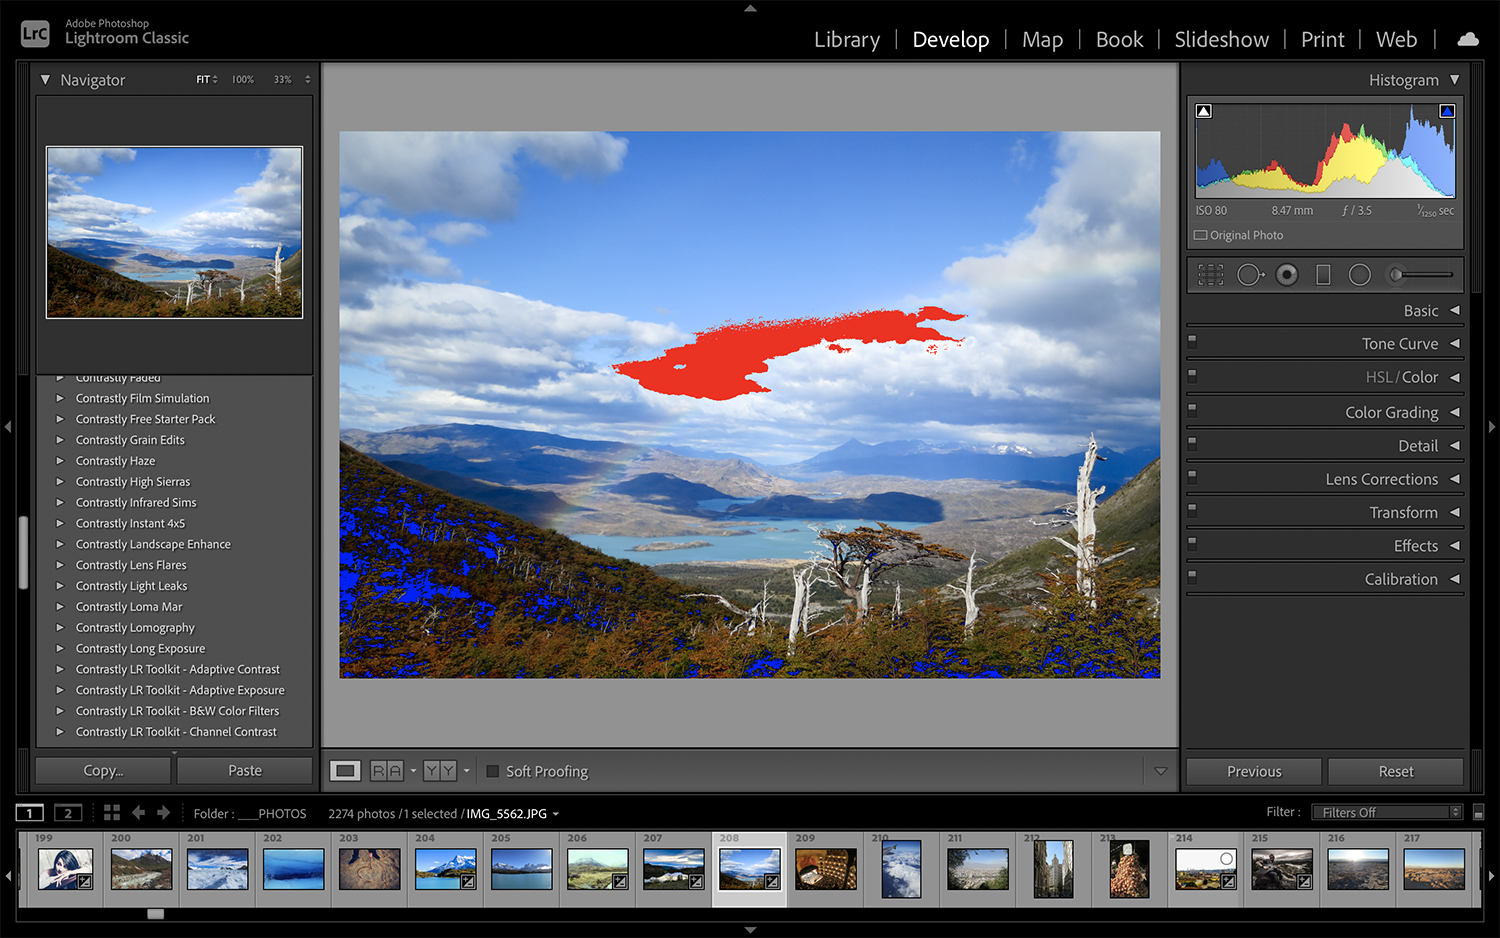
Clipping happens when you have areas with no information in your photo. This results in areas that are either completely white for highlights or black for shadows. These are also referred to as blown-out areas of a photograph.
To turn both the highlight and shadow clipping warnings on or off in Lightroom, hit the J key, and they’ll be highlighted in red. To fix your clipping, move the highlight or shadows slider. These red areas should become less noticeable in your image.
9. Dimming An Image
Lightroom has a nifty little feature to focus in on the image you’re editing and get a better idea of how it looks without the clutter of a busy workspace.
Hit Shift + Tab to hide the panels in Lightroom. Press L to dim the actual workspace, and press L again to completely darken your layout except for the image you’re currently working on. This is extremely useful for photographers who may not have as much room to edit on their monitor.
10. Keyboard Shortcuts
It goes without saying that the fastest way to improve your editing – and probably the most universal tip for success in Lightroom—is learning keyboard shortcuts. When mastered, Lightroom shortcuts help you navigate with ease and can cut down on editing time.
Shortcuts are activated through your keyboard simply by clicking a combination of two or more keys at once. Common Lightroom shortcuts include:
- Pressing P to flag photos
- 1-5 to cull photos
- “\” to view the before and after of your images
- G to enter the grid library view
- D to enter the Develop module
Explore your options and find out what keyboard shortcuts work best for your editing! For a comprehensive list of shortcuts, make sure you check out this handy PDF by Adobe.
Try These Lightroom Tips Today
I hope you found a few of these Lightroom editing tips helpful for your next photoshoot or photo session. When you increase the productivity of your editing time and limit the amount of work spent processing images, your ability to focus on your craft and your business will greatly increase.
These tips will act as a useful guide for increasing your familiarity with Lightroom. As a result, you’ll create even better images for your portfolio, clients, or photography business.
About the Author: Morey Spellman
 Morey Spellman is an LA photographer with 10+ years of experience shaping light and vision into images. He works with The Glorious Company, a content marketing agency.