The Ultimate Guide to Aperture for Enthusiast Photographers

One of the wonderful things about photography is that it can be as simple or as intricate as you’d like to make it.
For instance, you can enjoy the art of nailing a stunning composition without worrying about the details. Using a camera’s automatic mode is great for this and will usually result in some decent shots.
For those who want to dive deeper, however, there is a world of technical discussion and “strategy” in a camera’s manual mode.
One of the settings we can adjust to further improve our photography in certain situations is the aperture. Here, we’ll discuss what “aperture” is, how it works, and when you should consider giving your settings an adjustment.
Aperture Demystified
Yes, the discussion surrounding aperture can become technical, but don’t run! We promise we’ll make it easy. Let’s start by having a quick look at exposure.
Aperture as a Team Player
Exposure is simply the amount of light that’s allowed to enter the camera and reach the camera’s sensor. It’s this light that results in the possibility of a photograph, so the concept of exposure truly lies at the core of photography and the technology that makes it possible!
The amount of exposure (or amount of light that reaches the sensor) can be modified by three settings that all work together to determine the overall exposure of any image. These settings are shutter speed, ISO, and aperture – fondly called the exposure triangle.
In other words, the aperture can affect exposure by itself, but it’s not the only thing that will affect the resulting exposure in a photograph. Now, you’re probably asking how aperture changes the amount of light entering the camera, so we’ll get on with it!
How Aperture Works
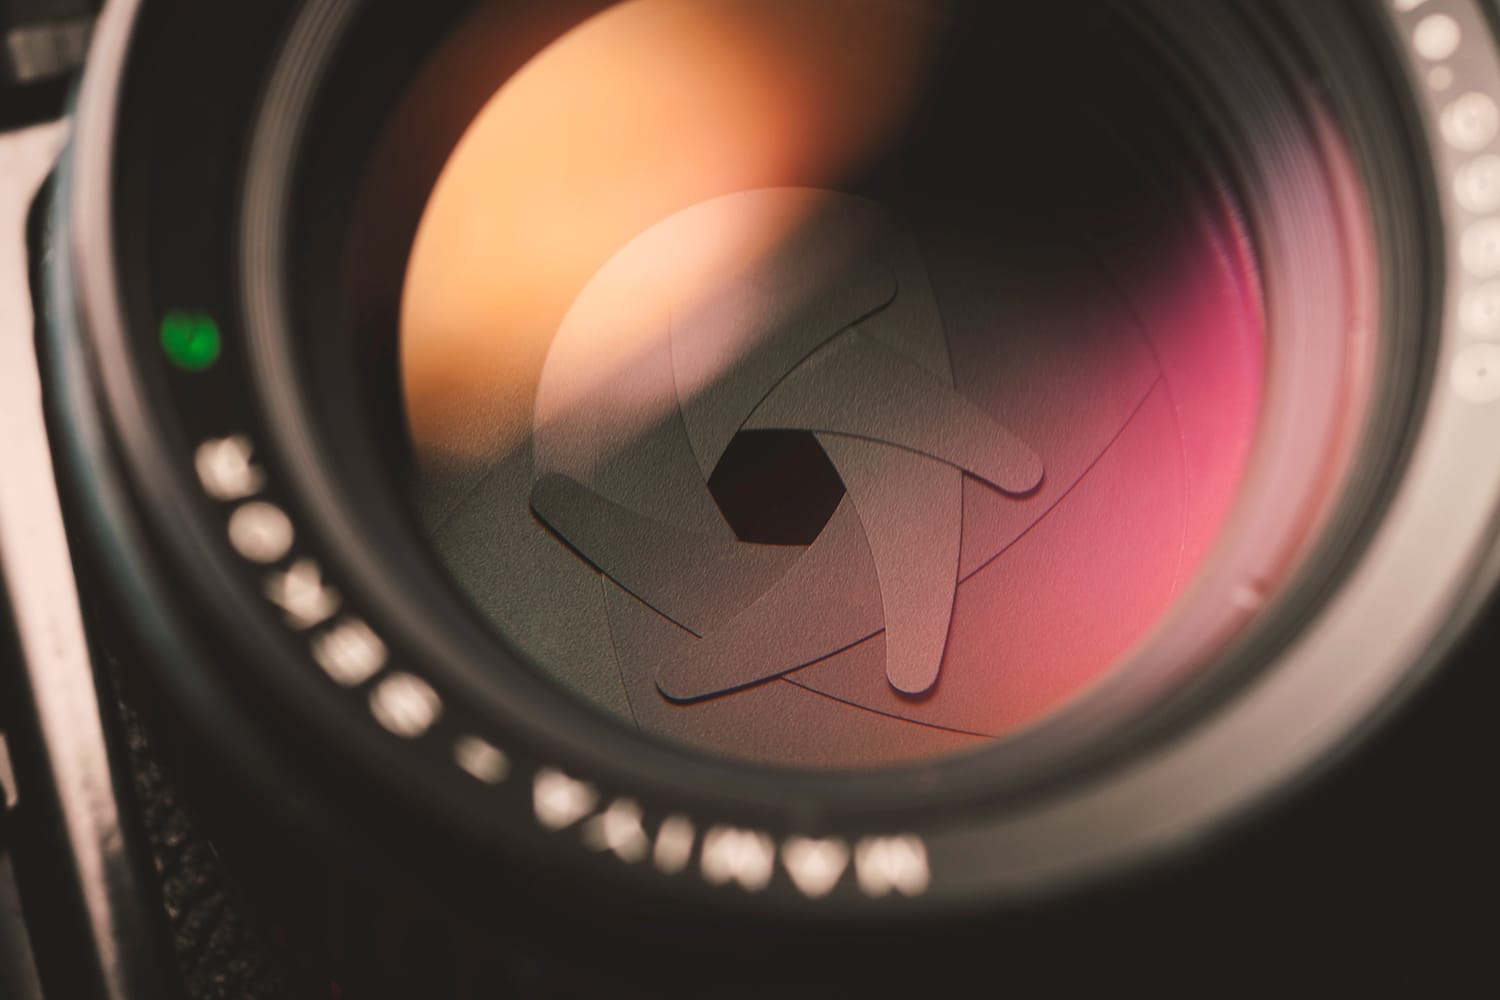
The aperture itself is a hole in the camera’s lens that ushers light within the camera to reach the sensor. Some people understand this better by thinking of the camera lens as an eyeball. If the lens is a human eye, the aperture would be the pupil, where light passes through the eye to eventually result in the vision of your surroundings.
In cameras, the size of this hole can be changed by a mechanical diaphragm. As you might imagine, when the hole is larger, more light can enter through the lens into the camera.
Changing this setting is what’s known as changing the aperture and, as you now know, taking control of your exposure settings.
Considering Depth-of-Field
While it’s true that aperture plays a considerable role in the resulting exposure levels of a photo, we can’t neglect to mention that aperture also affects a photo’s depth-of-field.
The depth-of-field is a measure of how focused a background is behind the subject. A shallow depth-of-field will have a subject in the foreground in focus, while the background behind the subject is out of focus. A higher depth-of-field means that the background will be in focus, too.
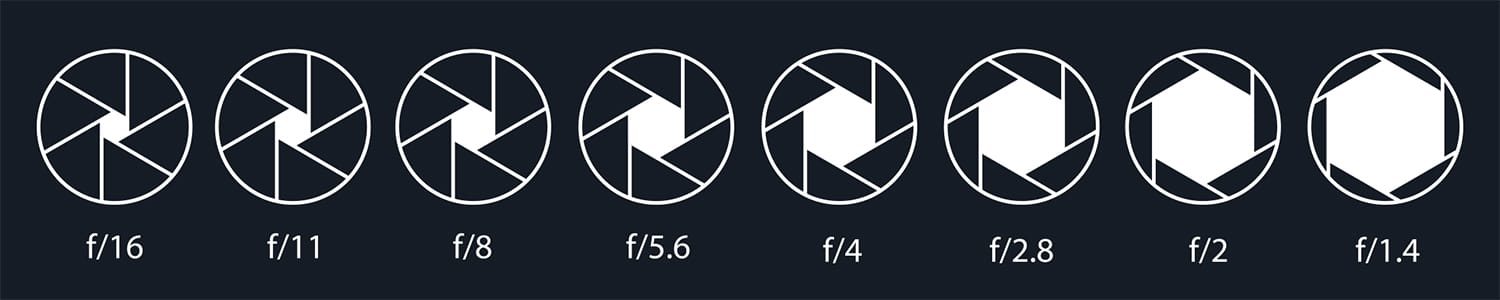
When the size of the aperture is larger (and the f/stop number is smaller), the depth-of-field will be shallower.
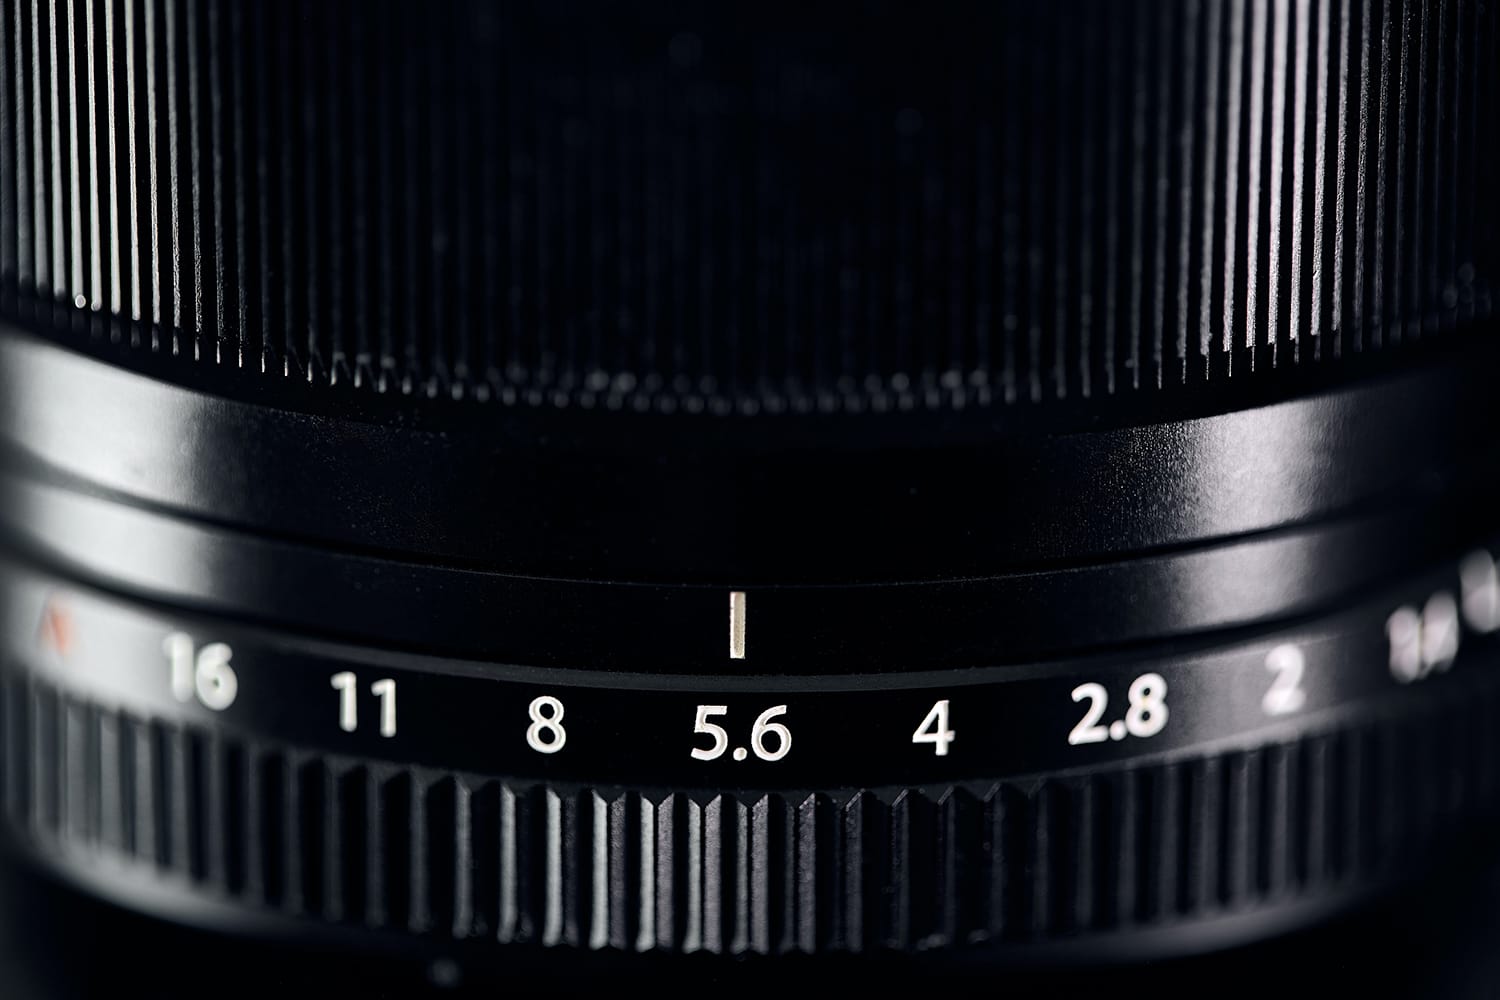
Understanding the Numbers
Let’s take what we’ve learned so far and put it into practice by discussing a few of the more common aperture settings.
An aperture will read as f/”some number”, which we call f/stops. For example, photographers love to use f/11 and f/1.4 for landscapes and portraits, respectively, but we’ll come back to those specifics in a moment.
For now, keep in mind that the higher your f/stop, the smaller the aperture. To some of you, this may seem counterintuitive, but this higher f/stop and the corresponding small aperture will mean less light entering the camera and, therefore, less exposure.
The f/stop scale when it comes to photography, is usually: f/1.4, f/2, f/2.8, f/4, f/5.6, f/8, f/11, f/16, f/22. Some lenses can go a little farther, like f/32, or even f/64, but that’s not very common these days. You will also often see apertures such as f/0.95, f/1.2, or f/3.5 – those are also valid f/stop numbers.
A Quick Review
Before we move on to discuss when certain apertures are better than others, let’s quickly review what we’ve covered so far.
- A lower f/stop number means a larger lens opening, more light entering the camera, more exposure, and less depth-of-field.
- A higher f/stop number means a smaller lens opening, less light entering the camera, less exposure, a greater depth-of-field, and more elements in clear focus.
Some Common Aperture Settings
We touched on this briefly in the previous section of this article, but now we’ll head a bit further about when expert photographers decide to use a particular f/stop.
In particular, let’s talk about landscapes and portraits.
1. Portrait Photography
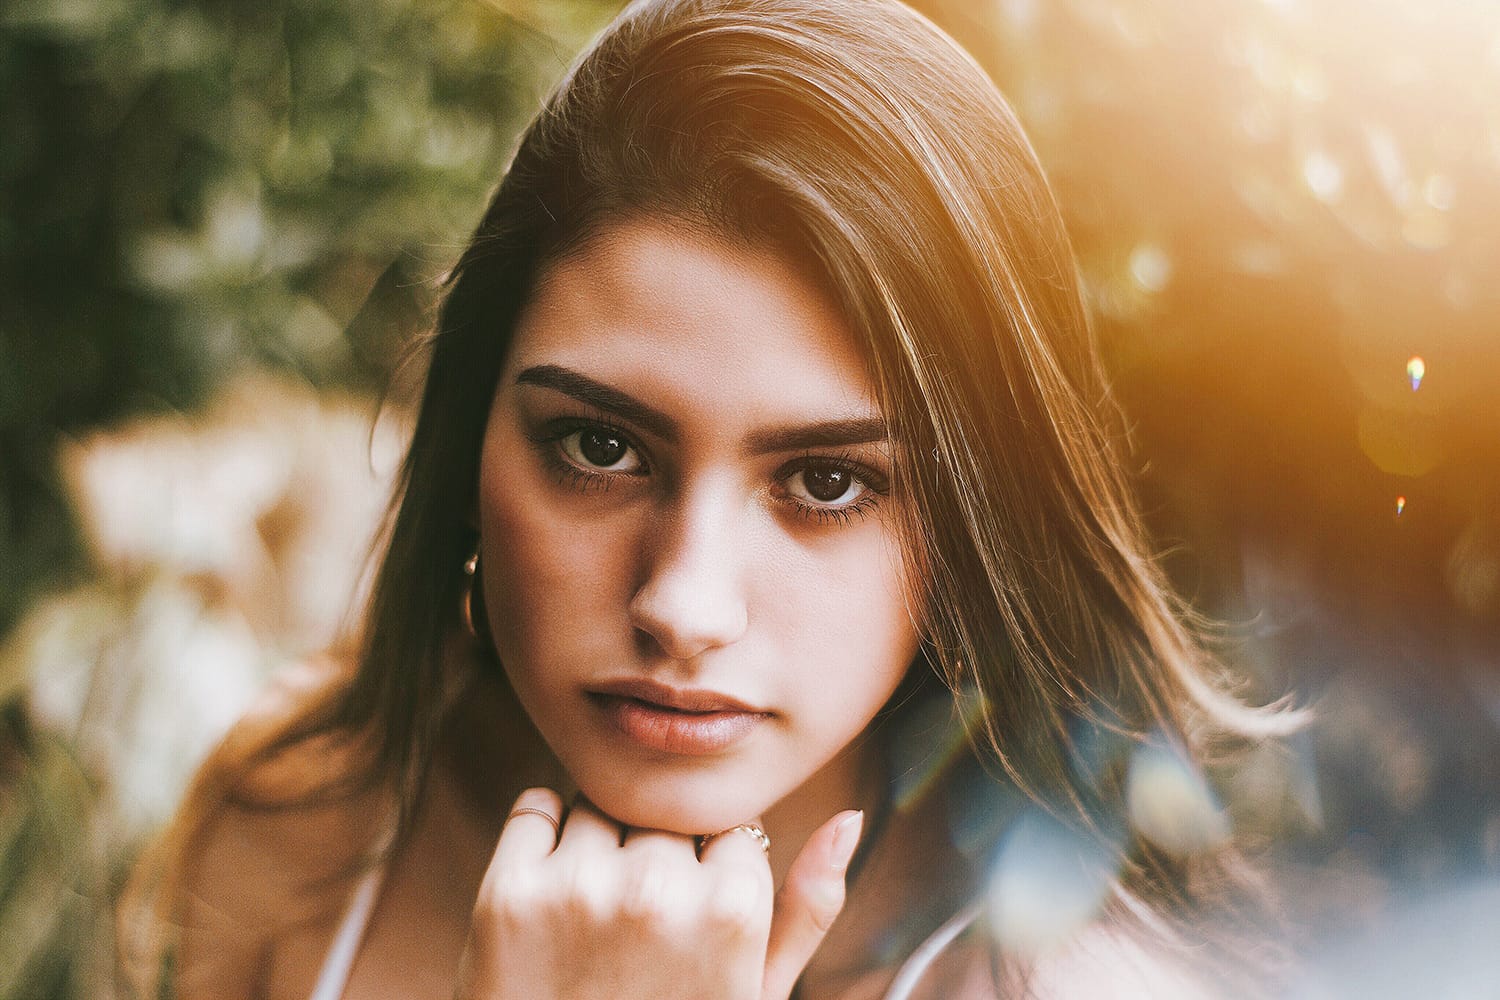
There are few things more satisfying in portrait photography than nailing a shallow depth-of-field that maximizes the subject’s appearance and turns the background into an appealing blur and giving our subject that “3d pop“. I’m sure you’ve heard the term “bokeh” before?
Lower f/stops such as f/1.4 or f/2, therefore, are great for portrait photography as long as other measures are taken to decrease the exposure and prevent hot spots on the subject’s face.
You can always refer back to your camera’s histogram to check that your image is exposed correctly.
2. Landscape Photography
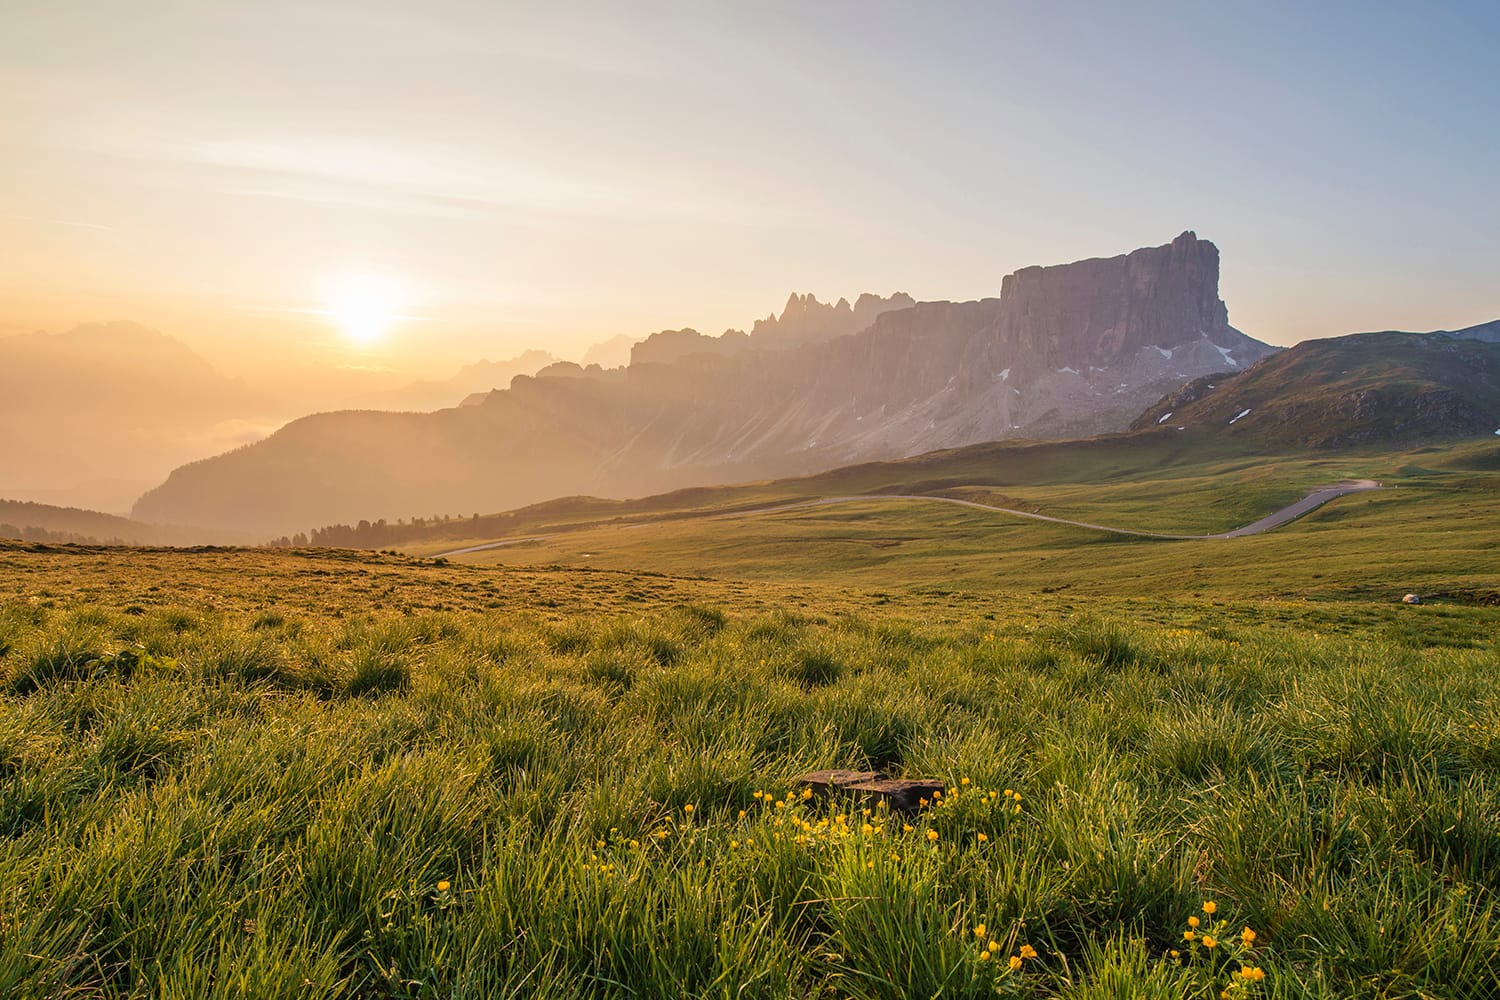
Shooting landscapes is an entirely different beast, one where you’ll probably want a greater depth-of-field to capture the beauty of both foreground and background. It makes sense, then, that higher f/stops like f/11 or f/16 are often used to achieve this effect.
3. The Custom Situation
Of course, you’ll be shooting plenty of things other than portraits and landscapes, but a simple knowledge of aperture can help you determine what’s best for any situation.
For instance, ask yourself a few questions. Are you shooting in low light? If so, an increased aperture size may benefit you, say going from f/4 to f/2. Bright sunlight may encourage you to increase your f/stop to allow less light in – maybe going from f/4 to f/8.
Consider how you want your depth-of-field to appear as well, and don’t be afraid to take the same shot a few times with a different aperture setting each time as you finalize the look you’re hoping to achieve.
Wrapping Up
If everything we’ve discussed here doesn’t make sense right away, don’t fret! Aperture is one of those technical aspects of photography that might not click right away. The best way to understand aperture and learn how to use it intuitively in the field is to practice.
By setting your camera to aperture priority mode and shooting with a wide range of apertures, you’ll begin to notice patterns and make associations. Eventually, this will result in a better understanding of how aperture works and when you should use certain apertures.
About the Author: Jon C. Phillips
 Jon C. Phillips is a photographer, watch lover, product developer/designer, guitarist & musician, and all-around web nerd. He's the founder of Contrastly which he launched in late-2012. He also co-founded DailyPhotoTips and TheDailyPreset.