How To Create Presets in Lightroom Classic (+ 5 Free Presets)
 by
Adam Welch
by
Adam Welch

Presets are one of the most powerful ways to speed up your photo editing workflow. They enable a photographer to save time by not having to painstakingly adjust each aspect of an image.
When using presets, tedious post processing can be reduced to just a few clicks of the mouse. There is a gloriously large amount of ready-made Lightroom presets on the market today (some pretty awesome presets are sold right here on Contrastly!) They are downloadable and can make your image editing painless.
At the very least, they can give you a good starting point and leave you with only needing to slightly adjust the settings manually. Don’t think that presets are just for those who are starting out in photography, either. Everyone, from the super newbie to the seasoned pro can use presets to give their post processing prowess boost.
Another great thing about presets is that they can be simple to make and save for your own use. Do you find yourself constantly using similar settings for your portraits? Why not make a preset with those settings so that you can save yourself a load of time. Love black and white photos? It makes sense to save your most used contrast, shadow, and highlight settings to give yourself a head start on your next project.
If you’re using Adobe Lightroom, in just a few easy steps you can make your very own customized Lightroom presets. Be warned, though, making your own presets can be quite addictive and you’ll wonder how you ever managed without them!
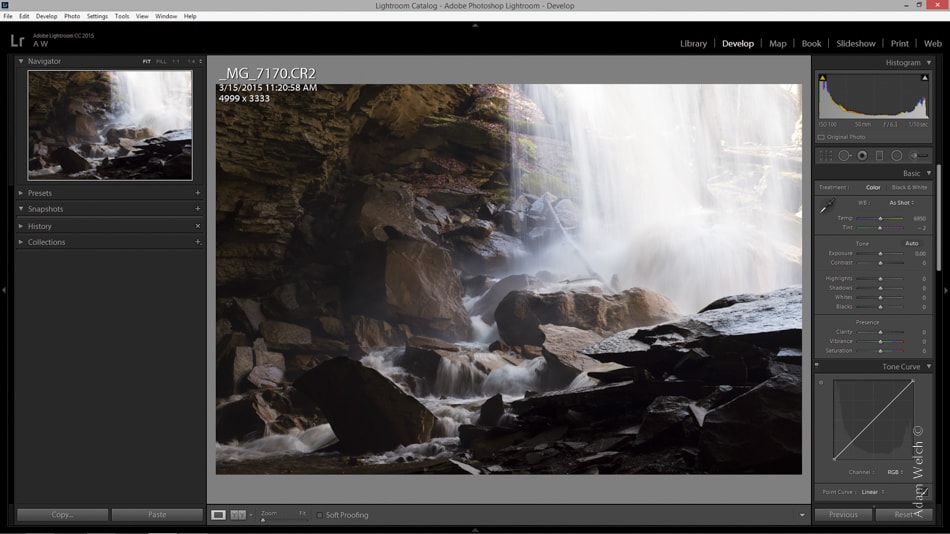
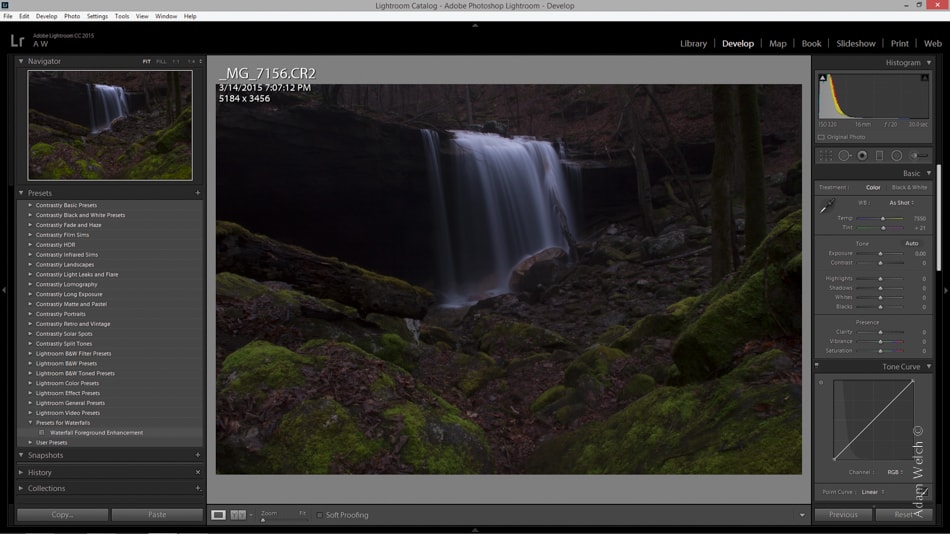
Let’s start with an image from my archive which I shot last spring. I do quite a lot of landscape and nature photography and I have always had a soft spot for waterfalls. Quite often I use similar post processing on many of my waterfall images. Here is the RAW file (RAW is always your friend) freshly imported and opened in the develop module of Lightroom 6.
I definitely want to bring some detail back into those shadows and highlights, so I begin to make my edits. First with some shadow and highlight recovery.
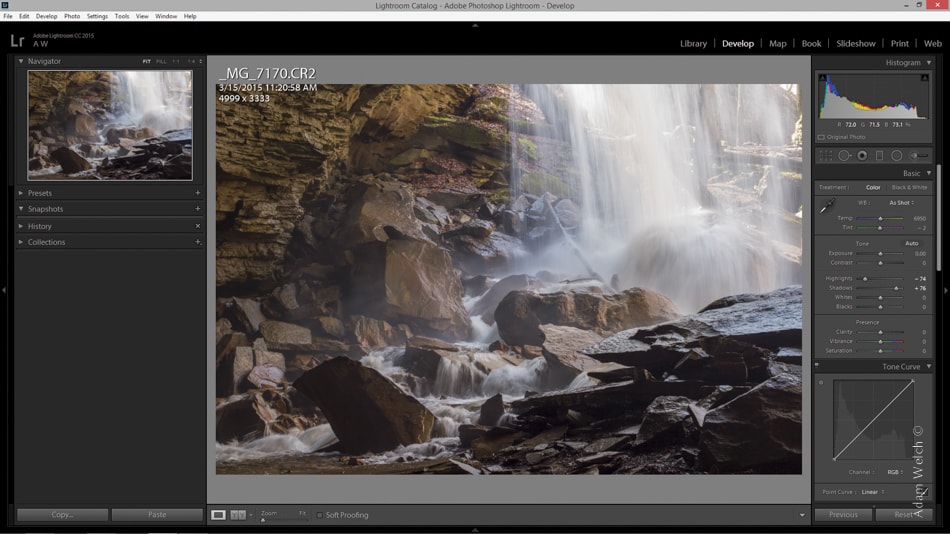
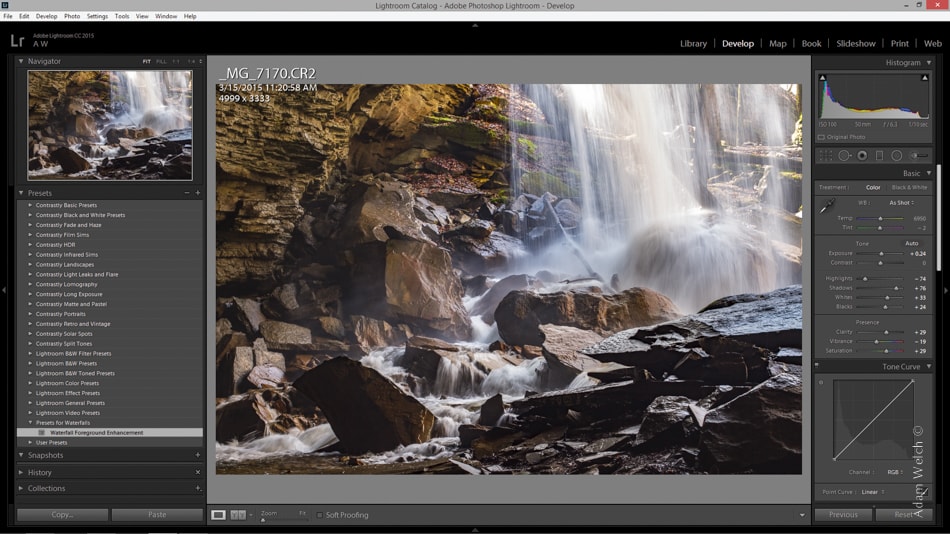
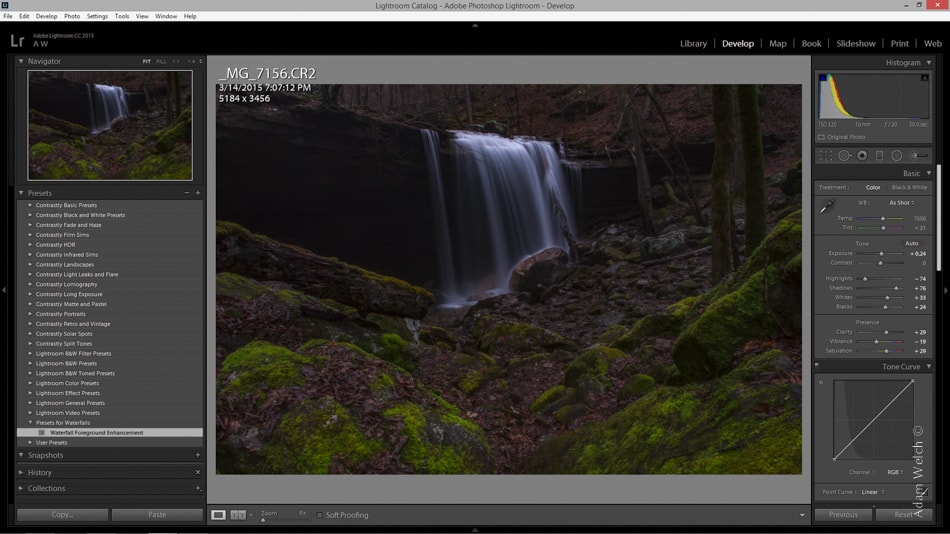
After a few more adjustments, I have an image with which I am satisfied. The photo has lots of foreground interest so the majority of the processing was aimed to enhance the textures and lighting there. I also upped the sharpness and clarity as well as adjusted the vibrance and saturation. So, let’s make a preset based on these edits. That way, when I run across another image with similar composition (large foreground) I can save myself some editing time. Let’s get started!
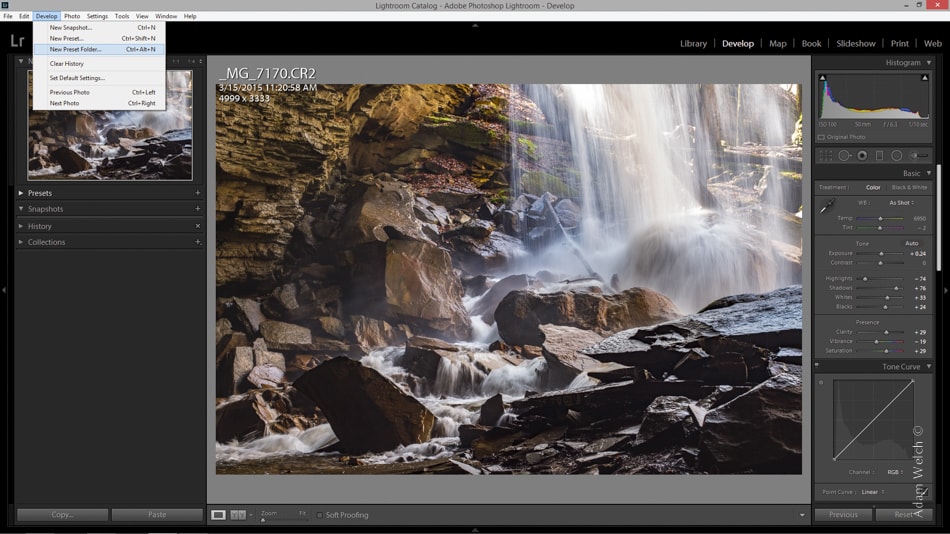
First, I want to create a place to house the preset I am about to make and that means creating a preset folder. Locate the develop tab at the top left of the screen. Then select “New Preset Folder.”
Choose an easily identifiable name and select “Create.” Now there is a folder to place any future presets I make for my waterfall photos.

In the column to the left of the image, open the “Presets” drop down. There is the shiny, brand new folder we just made.

Now that I have a nice and cozy place for my presets to hang out, it’s time to make the actual preset based on the edits from this particular image. In the same Develop tab we visited to make the new preset folder, click… you guessed it… “New Preset.”

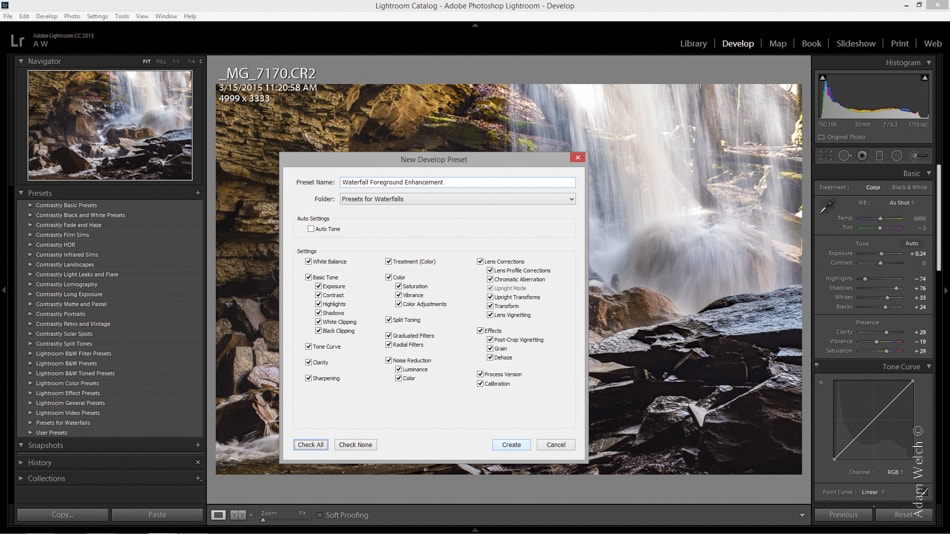
This will bring up a dialog box that has a host of checkable boxes and options for which of your edits the preset will save. Stay with me! It isn’t as complicated as it looks! The first thing you will need to do is to make sure the correct destination folder is selected from the folder drop down list. Once that correct folder is chosen it’s time to name the new preset.

Use descriptive words here so you can readily discern later what edits the presets will actually apply to your image. To be on the safe side, it is a good policy to check all the boxes, unless you would like to apply only certain settings or stack presets later on. Since this particular preset enhances foregrounds I will be super creative and give it the name “Waterfall Foreground Enhancement.” After you’ve chosen what settings to include and a name for the preset, click create.
Boom. As if by some sort of dark sorcery the preset appears in the folder I created a few moments earlier!
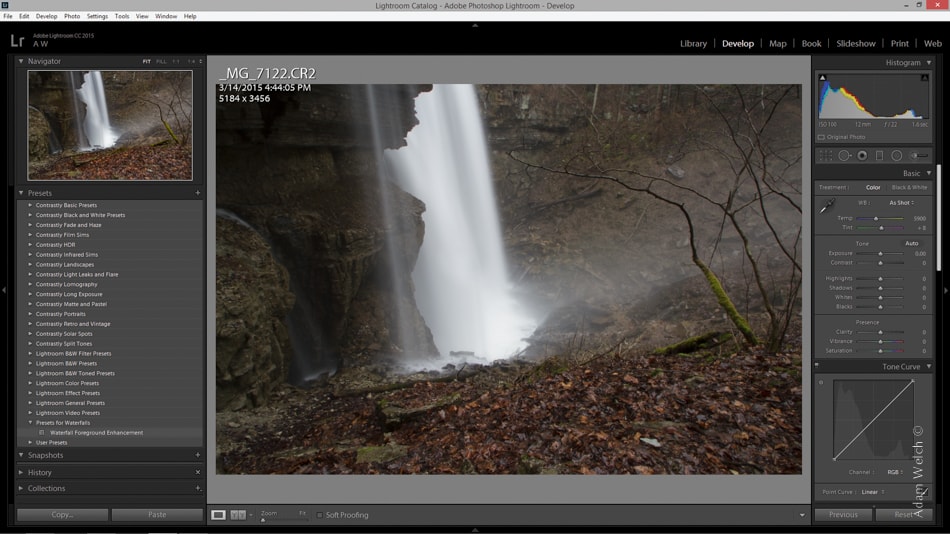
Now that we’ve made our preset, let’s try it out on some similar images and see just how well it performs. I have imported another photo with similar composition.
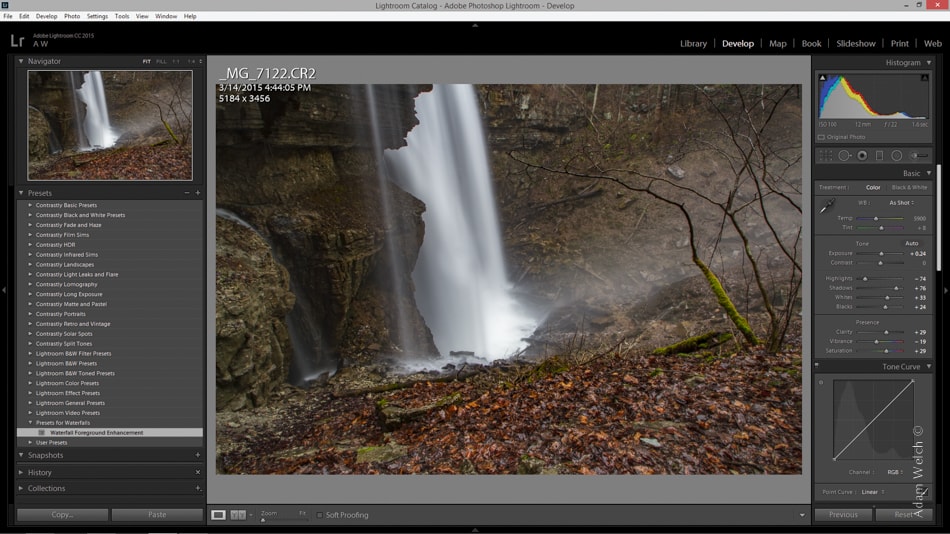
I locate the preset I made a minute ago and click. The preset does all the work! An image that might take me ten minutes to process has been reduced to less than a second of editing time!
Here’s another. Again, lots of things going on in the foreground.
Click the foreground enhancement preset I made and I’m done! The highlights are tamed, shadows are improved, and the whole image is clearer and detailed.

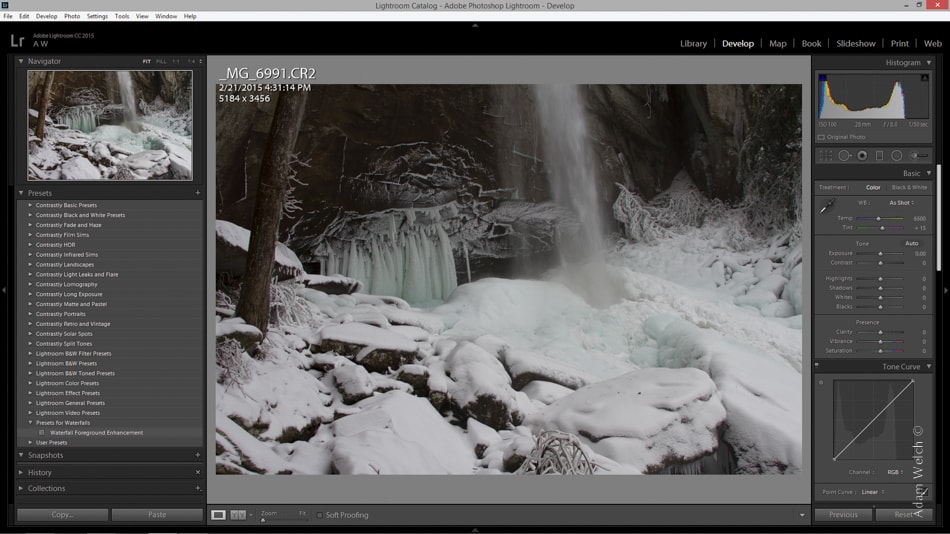
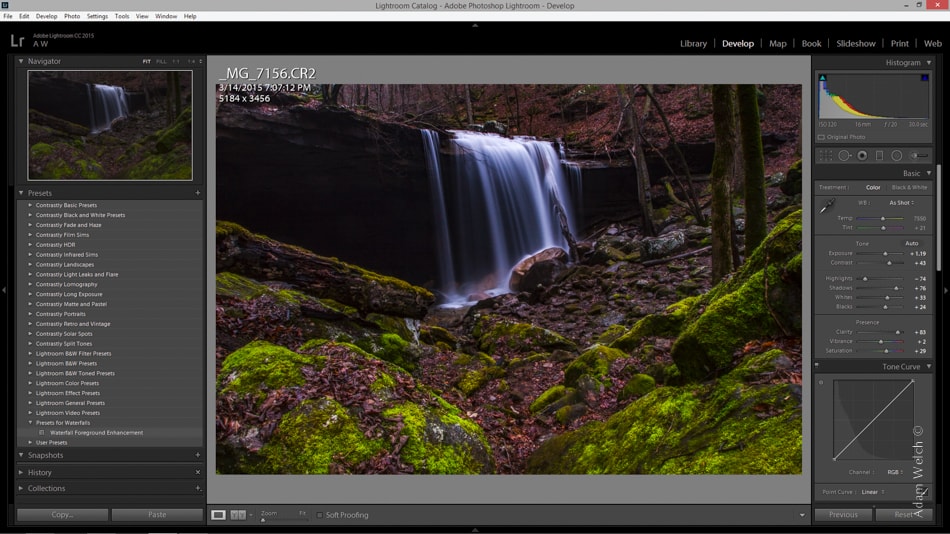
You may be thinking, “Yeah, but what happens when your preset doesn’t work well? What then, Adam? What then??? Huh? Tell me!” Don’t worry. You’re about to learn how to further adjust your image after a preset has been applied with less than favorable results. Look at the RAW image below. Same composition as the other waterfall photos with a large foreground consuming most of the frame. Let’s apply the foreground enhancement preset.
Not just a whole lot of help. The image has been brightened somewhat and became slightly clearer, but that’s about the extent of the result. Of course we can’t let that be the end of the story. We already have a starting point based on the edits applied by the preset so the only thing I need to do is take it a little further.
I increase the exposure and contrast and since I want the color of the moss to really pop I increase the overall saturation and vibrance of the image. Now I have a much more satisfactory photo and I still saved a lot of time!
Guess what else I’ve inadvertently done? Since, I have made a new preset to apply to other images where I want the foreground enhanced and when I need increased emphasis on color. So, I repeat the steps for making the first preset and chose a new descriptive name. I will call this preset Waterfall Foreground Enhancement Strong Contrast Vibrant. That way I’ll know exactly what edits this new preset will apply.
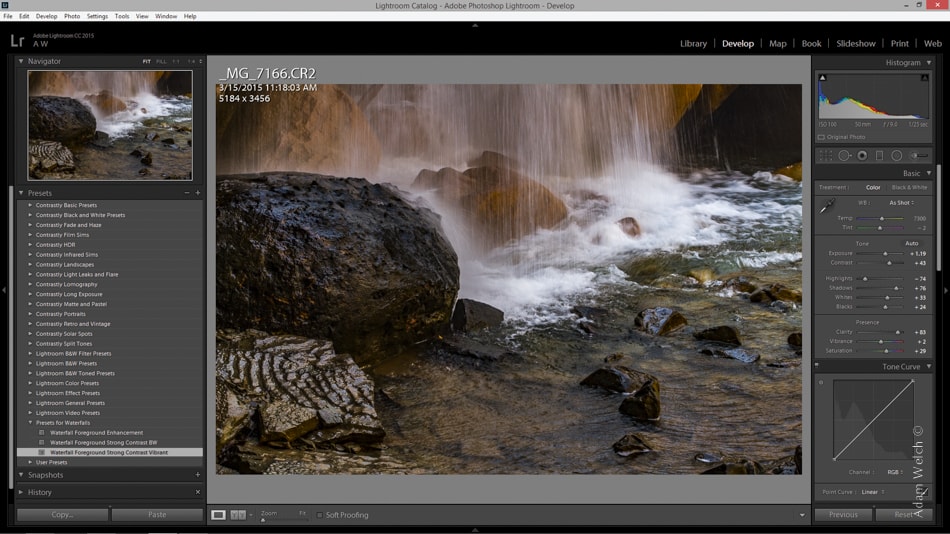
Let’s have another example. First, the RAW file

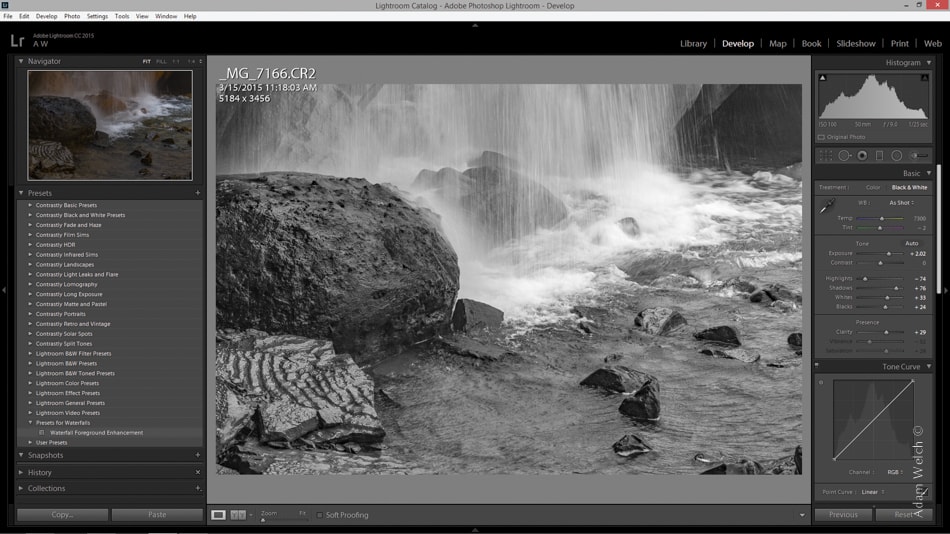
I apply the new preset from the last image which includes the additional contrast, vibrance, and saturation enhancements. The results aren’t bad but I want more. Based on the elements within the image (lots of contrasts, not much color, strong textures) I decide the photo might be stronger if it were to be converted to black and white.
Leaving all the other edits the same, I simply click the black and white conversion option in the develop section. The image is now black and white and…. wait for it…. I have yet another preset that I can name, save, and use later for similar waterfall images that require the same type of processing but ultimately might look better as black and white.
Creating your own processing presets in Lightroom can make your life a lot easier when it comes to editing your photos. Since you stayed tough and persevered to the end of this lesson, myself and the good folks here at Contrastly have a reward for you. You can have the very presets you’ve witnessed being concocted here plus two additional variations absolutely free!
That’s five free presets you can use to help make your photos look their best. Our gift to you just for being awesome and learning something new!
Please click the following link to download the ZIP file containing the 5 free presets.
You might also want to review our quick guide on installing Lightroom presets.
About the Author: Adam Welch
Adam is an author, adventurer, photographer and a jolly co-founder of Contrastly. You can usually find him on some distant trail making photographs, in his darkroom or at his computer writing and planning his next project. Follow his work over at his
website , Facebook, Instagram and YouTube .