10 Tips For Better Night Landscape Photography
 by
Marc Andre
by
Marc Andre

Photographing at night is one way to get intriguing photos! But night photography brings its own set of challenges and you’ll need to be prepared.
In this article we’ll look at ten tips that can help you to improve your night photographs and get the most out of your time shooting after dark. Follow these ten tips and you’ll speed up the learning curve of night photography. Let’s get started, shall we?
-
Have the Right Gear
Photographing at night will require you to be prepared, which includes having the right gear with you. You’ll almost certainly need a tripod, and other accessories like a flashlight and extra batteries are essential.
Many of your night photographs will be long exposures, and the longer the exposure the more battery will be used for each photo. At night it’s easy to quickly drain a battery so be sure you are prepared with some fully charged spare batteries.
In addition to the basic gear, there are also some really helpful apps and websites that can help you to plan your night photography. The International Dark Sky Association will help you to find dark skies with little to no light pollution. The Stardate Moon Phase Calendar will help you to plan based on the phases of the moon.
For plenty of other resources and recommendations see Gear and Resources for Night Photography.
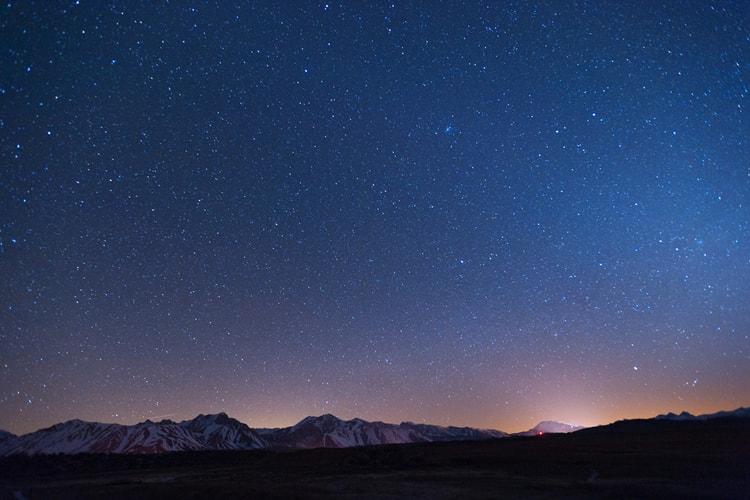
Night at the Hot Springs by John Lemieux -
Know Your Camera
Everything becomes a little more difficult when you are photographing at night. You may or may not be able to see and read all of the buttons and controls on your camera, so make sure that you know your camera well before shooting at night. A simple flashlight, or a headlamp, can help you to see what you are doing, but the better you know your camera the easier it will be.
Plus, if you are shooting in a popular location with a very dark sky you might annoy your neighbouring photographers and star gazers with constant use of your flashlight.
-
Scout the Location During the Day
Prior to heading out for your night session take time during the day to scout your location. Simply finding where to park and how to walk to your preferred spot during daylight hours can make things easier when you’re there in the dark.
Finding subjects and anticipating your shots during the day will also greatly help you to work more efficiently and to get better results at night.
-
Use Manual Focus
One of the challenges of photographing at night relates to focus. Depending on what you are shooting and how dark it is, auto focus may be totally useless to you. It’s usually best to rely on manual focus in order to get the best results. If you typically only work with auto focus during the day you’ll likely want to brush up on your manual focus skills before heading out at night.
If you’re shooting landscapes at night or the night sky you will typically want to focus at infinity, or just before infinity. For more info see this guide to manual focus.
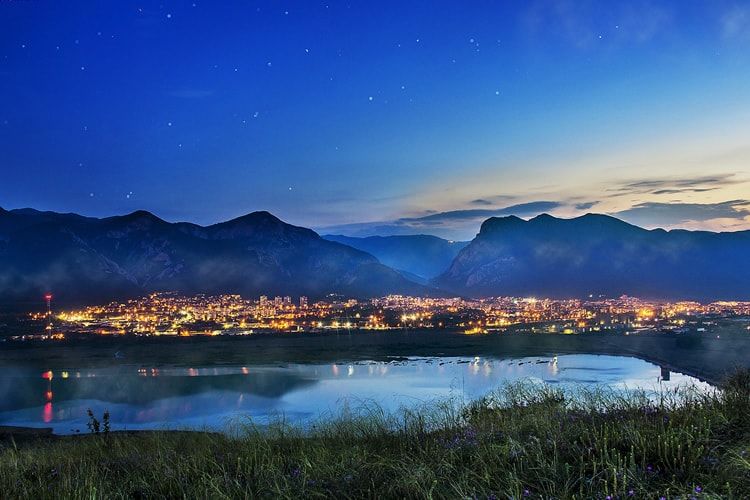
Good Evening by Chelssie L. Ivanova -
Use a Cable Release
With slower shutter speeds at night a tripod will usually be required to get a sharp photo.
Another way to help is to use a cable release rather than pressing the trigger manually. A basic cable release can be purchased inexpensively (either made by your camera’s manufacturer or a third party) and will allow you to get the sharpest photos possible without needing to resort to using the auto timer to avoid any shaking.
A cable release is also necessary if you will be shooting longer exposures in bulb mode (more on that later). Manually holding down a button to keep the shutter open in bulb mode is not a realistic option.
-
Know Your Camera’s ISO Capabilities
The ISO setting will obviously impact the shutter speed you can use at night. Most cameras will use a very high ISO at night on auto mode in order to avoid very slow shutter speeds.
In general, you’ll want to keep ISO low to avoid graininess, but many modern cameras, especially full-frame DSLRs, are now handling higher ISOs extremely well. Because of this, it is key to know your camera’s capabilities in relation to ISO. Take plenty of test shots at varying ISOs and examine them at 100% to see when the noise becomes an issue. When shooting at night be sure that you are keeping the ISO in a range that allows your camera to perform well.
-
Bracket Exposures
Bracketing exposures can be helpful for blending multiple exposures and for HDR processing. This can help you to get a better dynamic range while shooting at night. Bracketing can also help simply be ensuring that you don’t over or under expose the photo, since you will have several different exposures from which you can choose the best.
Most cameras have exposure bracketing built in, which makes it very easy. For more see this guide to exposure bracketing.
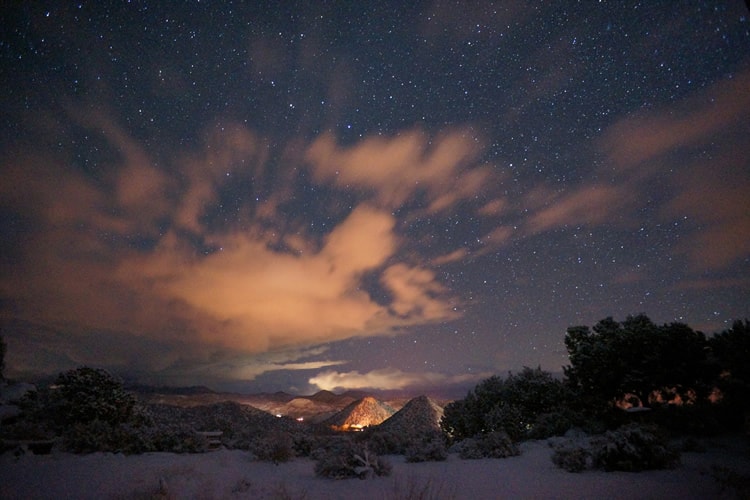
I’m in love with this view by Mike Lewinski -
Don’t Trust the LCD
LCD screens can be deceiving, especially at night. The brightness of the LCD can cause it to display the photo in a way that is much different than how it will look on your computer or when printed.
Instead of relying on the LCD, use the histogram to help determine how effectively your photos are exposed. If you’re not familiar with histograms see How To Use Your Histogram Correctly.
-
Shoot RAW
Shooting in RAW instead of JPG is a good practice in general, but it can be especially important at night.
Having more possibilities in post processing due to shooting in RAW will allow you to get much better end results. For more see Why Shoot RAW Over JPG?
-
Have a Stopwatch for Long Exposures
Many DSLRs will only allow you to shoot up to 30 second exposures in shutter priority or manual modes. For longer exposures you may need to use bulb mode, which will keep the shutter open as long at the button is held or the cable release is triggered.
In bulb mode it will necessary to keep track of how long the shutter is open, so a stopwatch will come in very handy. Most smartphones have a stopwatch function, or you can download an app.
Do you have any tips you’d like to share from your own experience of photographing at night?
About the Author: Marc Andre
Marc is an avid photographer and the founder of Loaded Landscapes, a blog completely dedicated to landscape and nature photography.